# Managing Workspaces in an Organization
Use Workspaces to organize your emails.
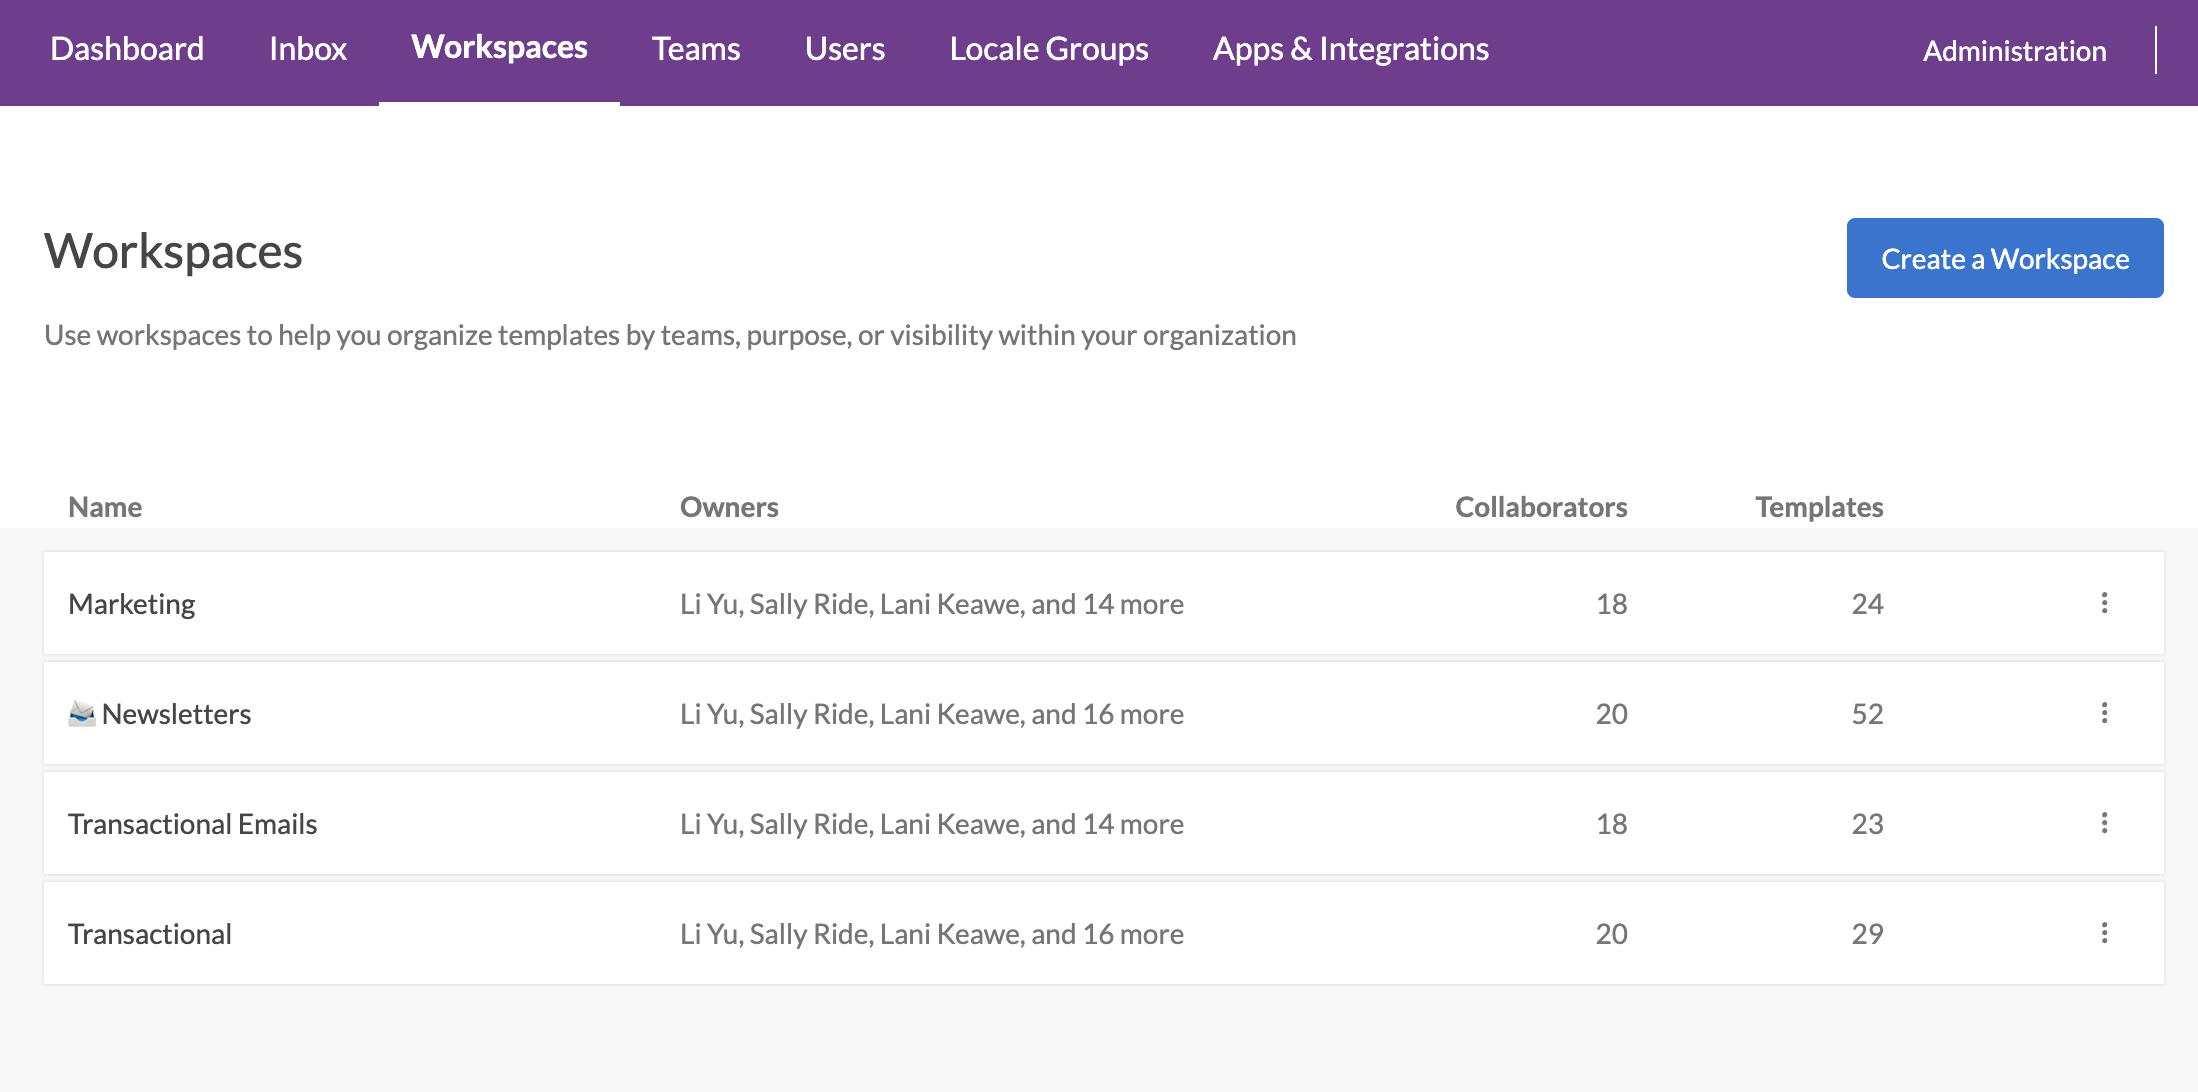
Workspaces can reflect how your organization assigns access to a group of emails, whether that is according to team, ESP, purpose, or customer visibility. All users added to a workspace will have access to the emails within that workspace.
## Create a Workspace
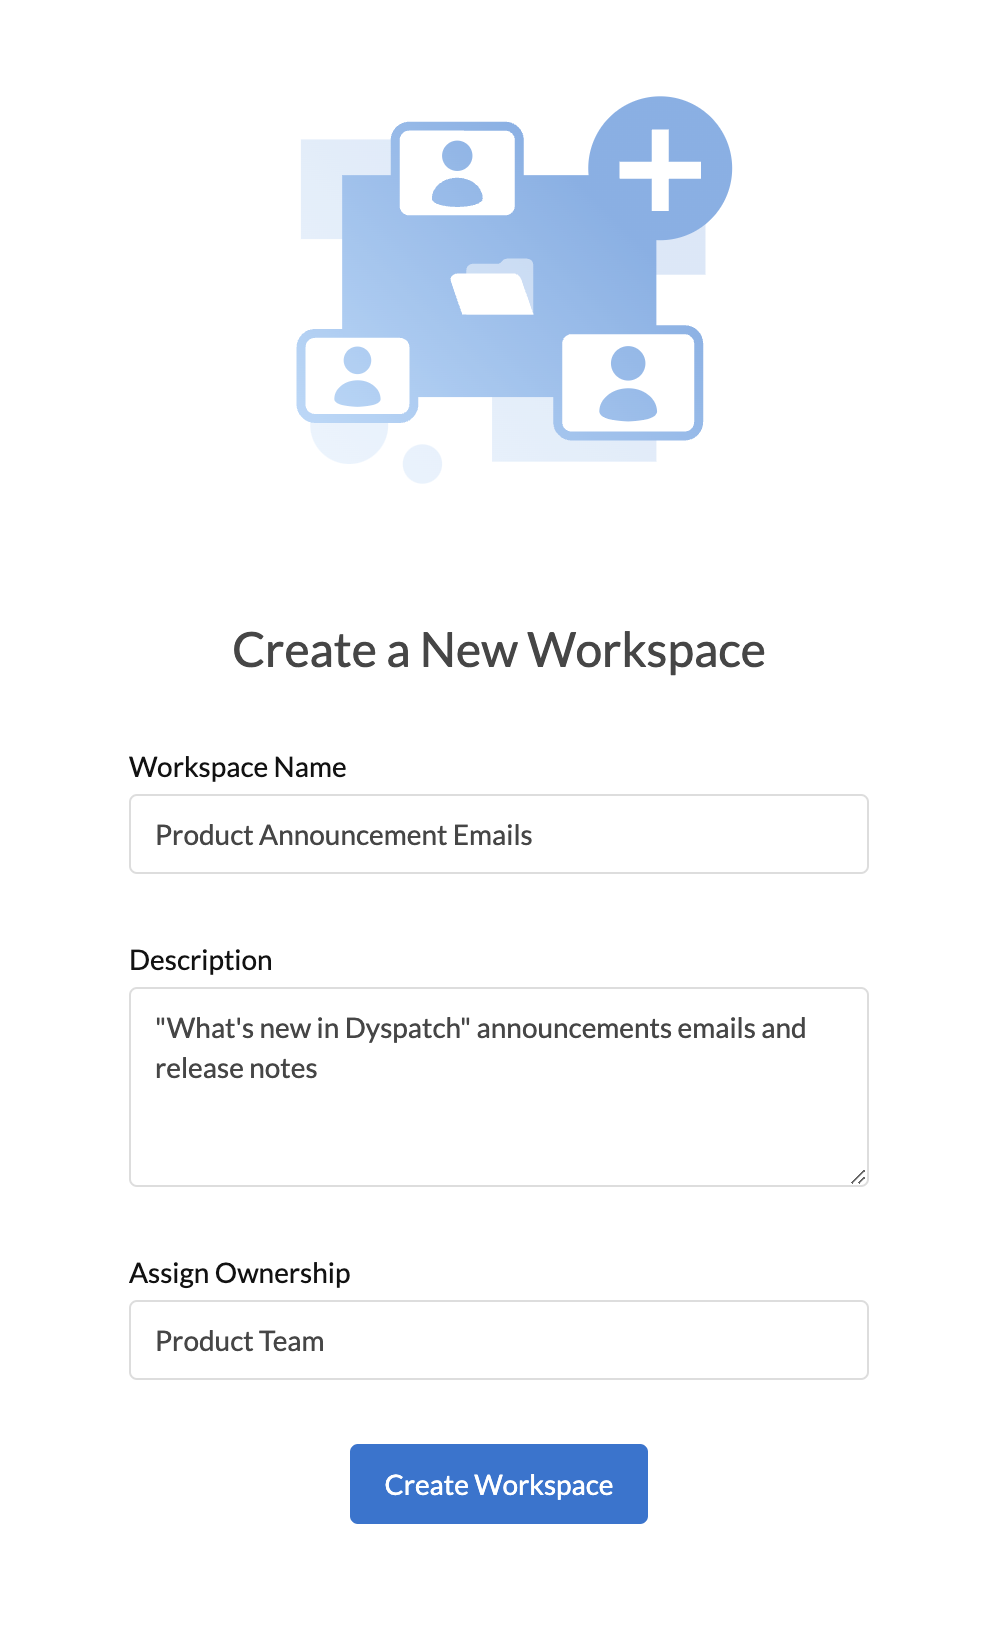
Click **Create a Workspace** on the [Workspaces Page](https://app.dyspatch.io/admin/workspaces) then add a name and description for that space.
You can also assign ownership of the workspace to an individual by email, or to a Team you have created. Don't have any Teams yet? Check out [Creating a Team](/administration/managing_teams/).
## Manage Workspace Collaborators
Edit or assign access permissions for Teams and Users by clicking the "
" for the workspace you would like to edit then selecting **View Collaborators** in the drop-down. You'll open the collaborator screen where you can edit roles and add new collaborators to the workspace.

Read more about [what each role can do](/administration/dyspatch_roles/) in a workspace.
## Manage Workspace ESPs
You can assign different ESPs, or different accounts from the same ESP service, to individual workspaces. This is convenient when say, your marketing emails need to be kept separate from your transactional emails.

To enable or disable individual ESP integrations per workspace, select **Mange Workspaces** under the "
" menu next to an ESP integration on your [Admin Email Services](https://app.dyspatch.io/admin/integrations/email) page.
See our list of direct ESP integrations at [Exporting Emails From Dyspatch](/exports/exporting_emails/).
 ## Manage Workspace Collaborators
Edit or assign access permissions for Teams and Users by clicking the "
" for the workspace you would like to edit then selecting **View Collaborators** in the drop-down. You'll open the collaborator screen where you can edit roles and add new collaborators to the workspace.

Read more about [what each role can do](/administration/dyspatch_roles/) in a workspace.
## Manage Workspace ESPs
You can assign different ESPs, or different accounts from the same ESP service, to individual workspaces. This is convenient when say, your marketing emails need to be kept separate from your transactional emails.

To enable or disable individual ESP integrations per workspace, select **Mange Workspaces** under the "
" menu next to an ESP integration on your [Admin Email Services](https://app.dyspatch.io/admin/integrations/email) page.
See our list of direct ESP integrations at [Exporting Emails From Dyspatch](/exports/exporting_emails/).
## Manage Workspace Collaborators
Edit or assign access permissions for Teams and Users by clicking the "
" for the workspace you would like to edit then selecting **View Collaborators** in the drop-down. You'll open the collaborator screen where you can edit roles and add new collaborators to the workspace.

Read more about [what each role can do](/administration/dyspatch_roles/) in a workspace.
## Manage Workspace ESPs
You can assign different ESPs, or different accounts from the same ESP service, to individual workspaces. This is convenient when say, your marketing emails need to be kept separate from your transactional emails.

To enable or disable individual ESP integrations per workspace, select **Mange Workspaces** under the "
" menu next to an ESP integration on your [Admin Email Services](https://app.dyspatch.io/admin/integrations/email) page.
See our list of direct ESP integrations at [Exporting Emails From Dyspatch](/exports/exporting_emails/).