Salesforce Pardot Integration Setup
Use our integration with Salesforce Pardot to deliver engaging email experiences to your customers. This guide will outline the steps to find all the information needed to integrate your Salesforce Pardot account to Dyspatch.
Finding your Account Business ID
The following section will outline where to find your Business ID. Each Pardot business unit will have its own associated Business ID. If your team has multiple business units across your Pardot account, you will need to integrate each unit into Dyspatch.
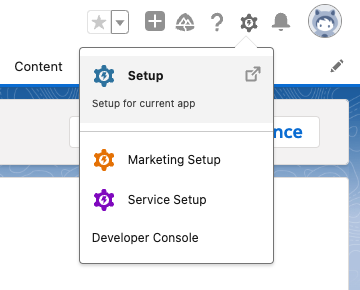
Upon logging into your Pardot account, click the gear icon near the top right corner and select Setup.
On the left navigation panel, expand the Account Engagement section and select Business Unit Setup.
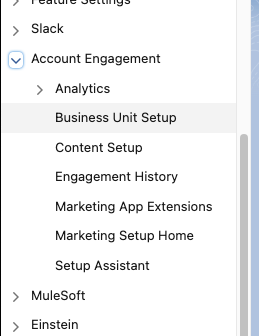
You will need your Business Unit ID for the Dyspatch integration.

Finding your Consumer ID and Consumer Secret
On the left navigation panel, search for Apps and select App Manager.
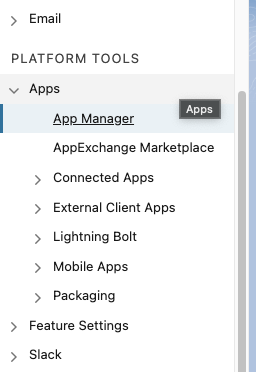
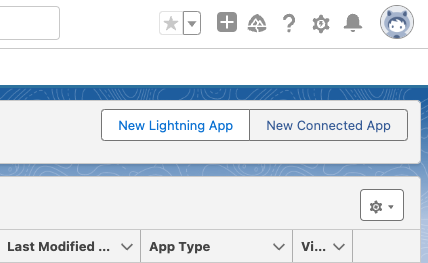
Click New Connected App.
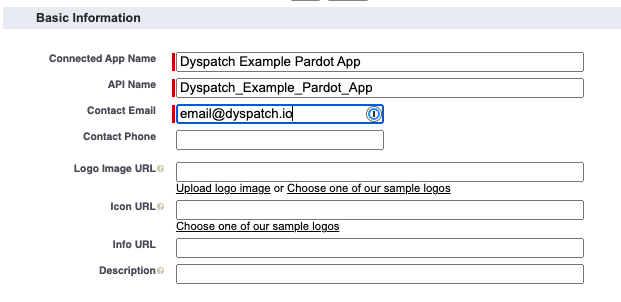
 In the “Basic Information” section, fill in the “Connected App Name”— this should be something descriptive to help your team identify this app is connected to Dyspatch. The “API Name” will be automatically generated for you. Add in your “Contact Email” address. Optionally, fill in the rest of the fields.
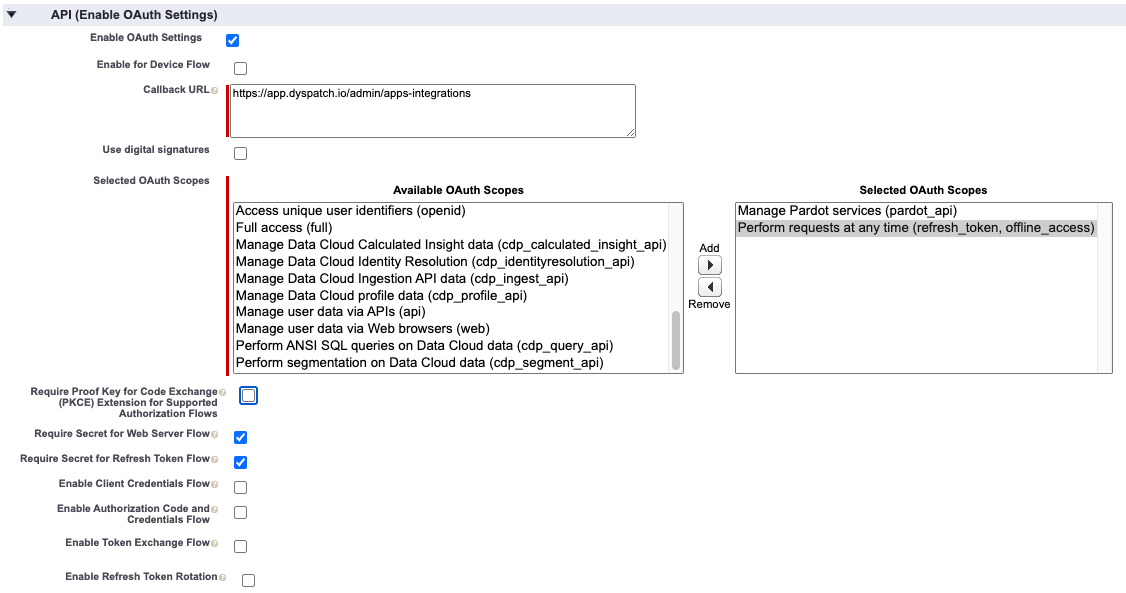
In the API (Enable OAuth Settings), ensure the checkbox is enabled for the Enable OAuth Settings.
The Callback URL will be https://app.dyspatch.io/admin/apps-integrations.
Add the following OAuth scopes:
- Manage Pardot services (pardot_api)
- Perform requests at any time (refresh_token, offline_access)
Uncheck the checkbox for Require Proof Key for Code Exchange (PCKE) Extension for Supported Authorization Flows.
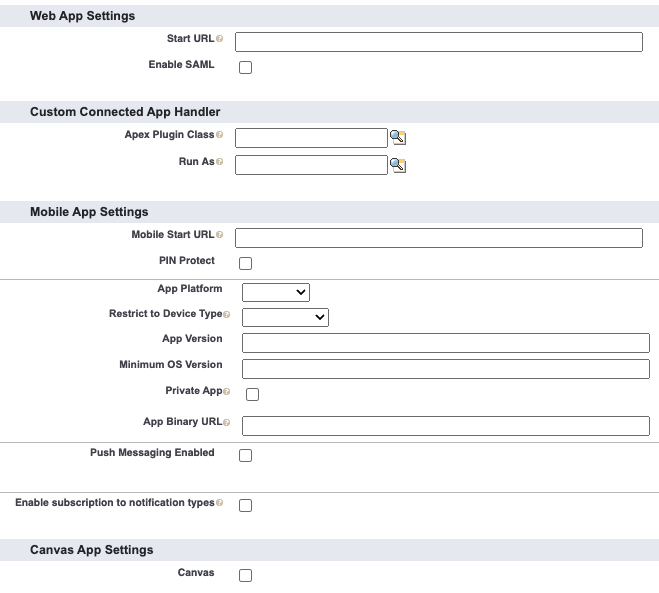
“Web App Settings”, “Custom Connected App Handler”, “Mobile App Settings” and “Canvas App Settings” sections can all be left with their default or empty values.
Save the new connected app and click Continue. Note changes can take up to 10 minutes to take effect.
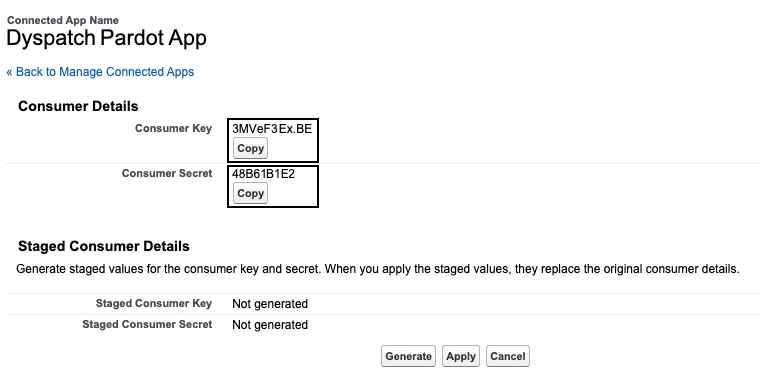
After creating the New Connected App, under the API (Enable OAuth Settings) section, click on the Manage Consumer Details button beside “Consumer Key and Secret”.
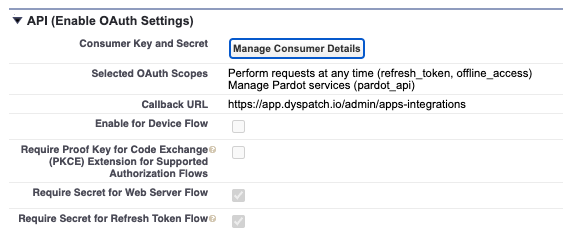
You will need your Business Consumer Key and Consumer Secret for the Dyspatch integration.
Connecting your Salesforce Pardot to Dyspatch
Now that you have the values we need from Pardot, we can add the integration in Dyspatch.
Select Add Integration on the Admin > Integrations page in Dyspatch.

Select Salesforce Pardot from the Choose an Integration dropdown:
- Business ID:
ie:123ABCDE456000mDBU(Finding your Account Business ID) - Localize Exports by: Language Only (en) OR Locale + Language (en-US)
- Short Description: Descriptive name to let other team members know what Pardot account this is
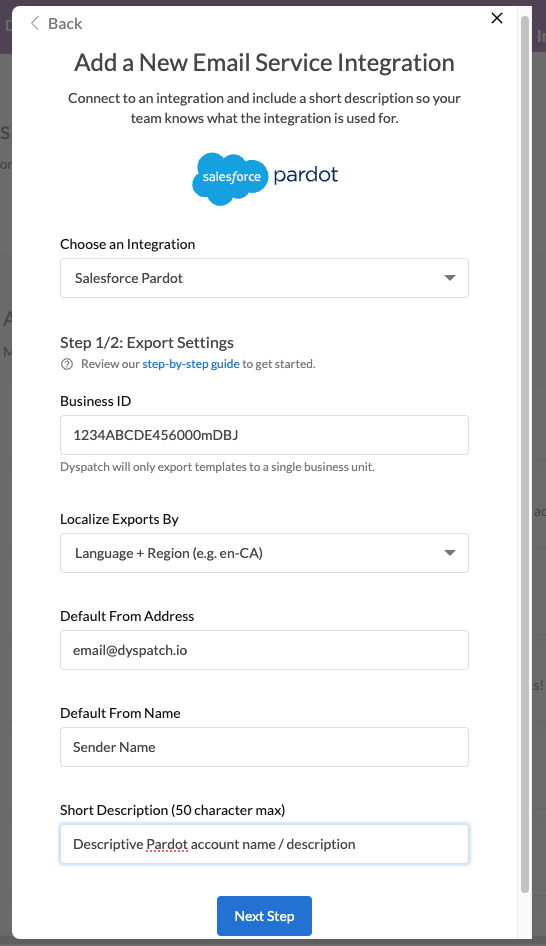
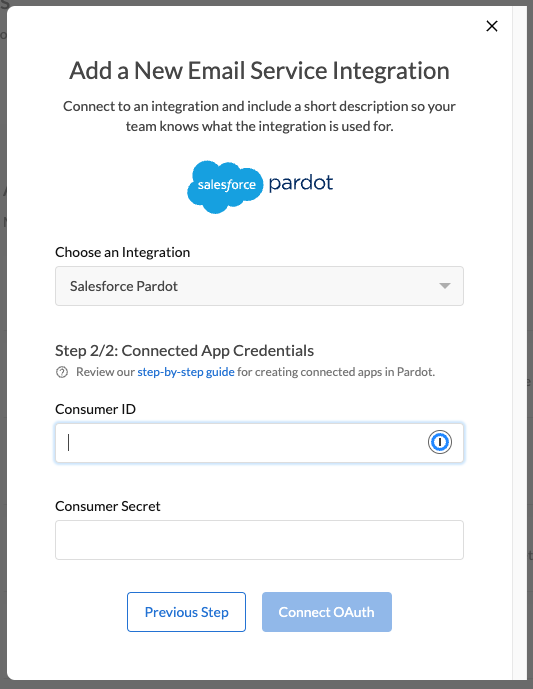
Next, input your Consumer ID and Consumer Secret from your Pardot account.
From our example, the values we would need are:
- Consumer ID:
3MVeF#Ex.BE - Consumer Secret:
48B61B1E2
Click here for steps on how to locate your team's Consumer ID and Consumer Secret.
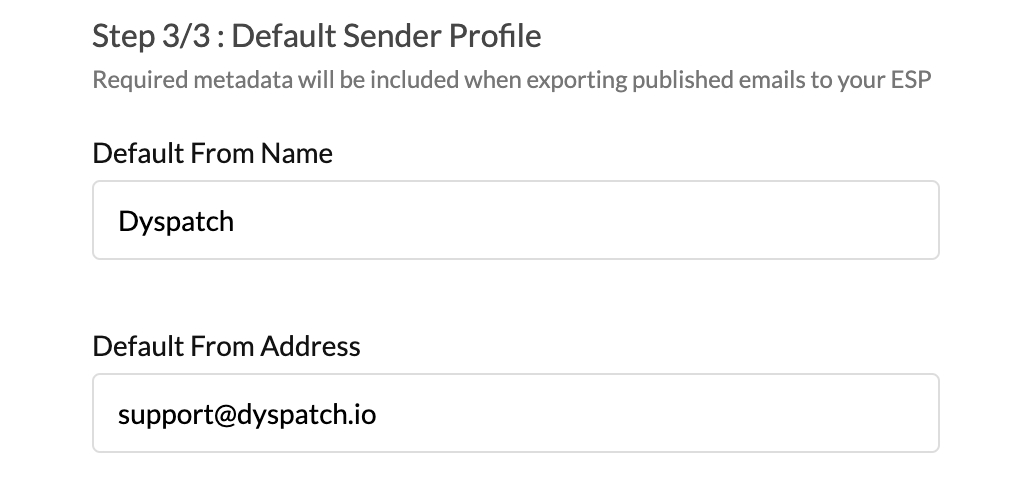
Add your default From Name and Address on the next modal. This can be overridden on individual emails from the metadata tab of the email builder.
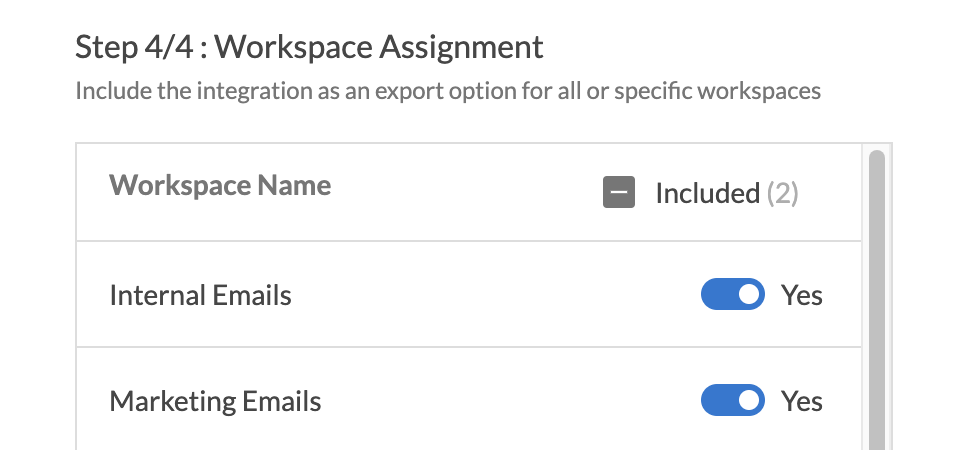
Lastly, toggle on or off each workspace you'd like this integration to be available in.
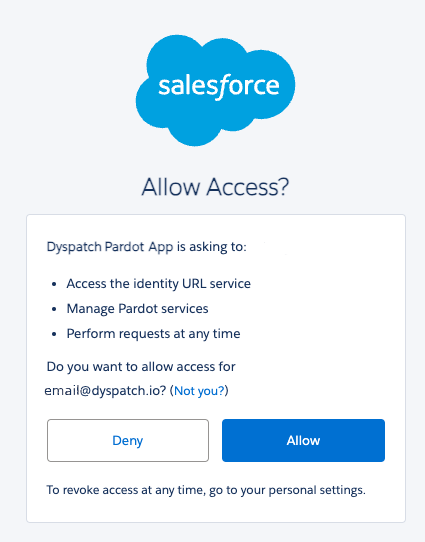
Once you have completed the fields, select Connect OAuth. This will redirect you to a Pardot authentication page to confirm access.
 That’s it! You can now create a new email in Dyspatch and export directly to your Pardot account.
Required Information Before Exporting
Variables
The following are required variables and must be available in your email before being able to successfully export your email into Pardot, including the text version. One of the following variables can be added to your email footer or any email block.
@{Unsubscribe}
OR
@{EmailPreferenceCenter}
Sender Settings
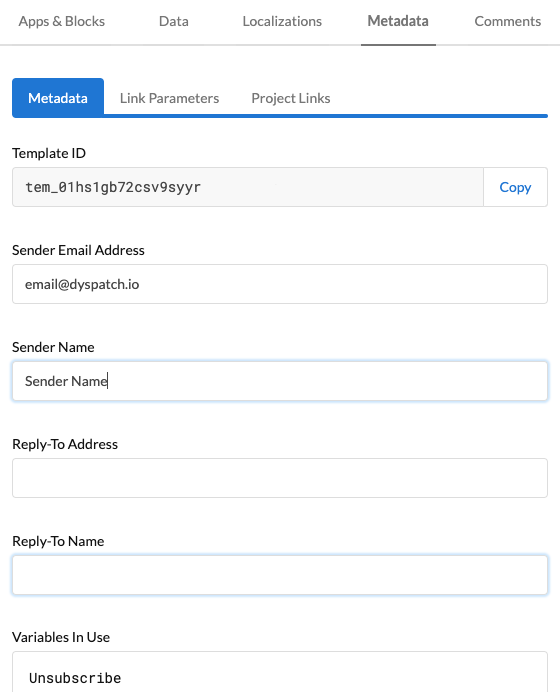
The sender details will be automatically filled in by your integration. You must have the sender email address and sender name filled in to export to Pardot. You can also override the defaults by using the Metadata tab in the email builder.
Exporting Your Email to Pardot
Once your email has been reviewed and approved by your team, you can now export your email using the Export button.
Select the Export to Integration tab and use the Salesforce Pardot option.

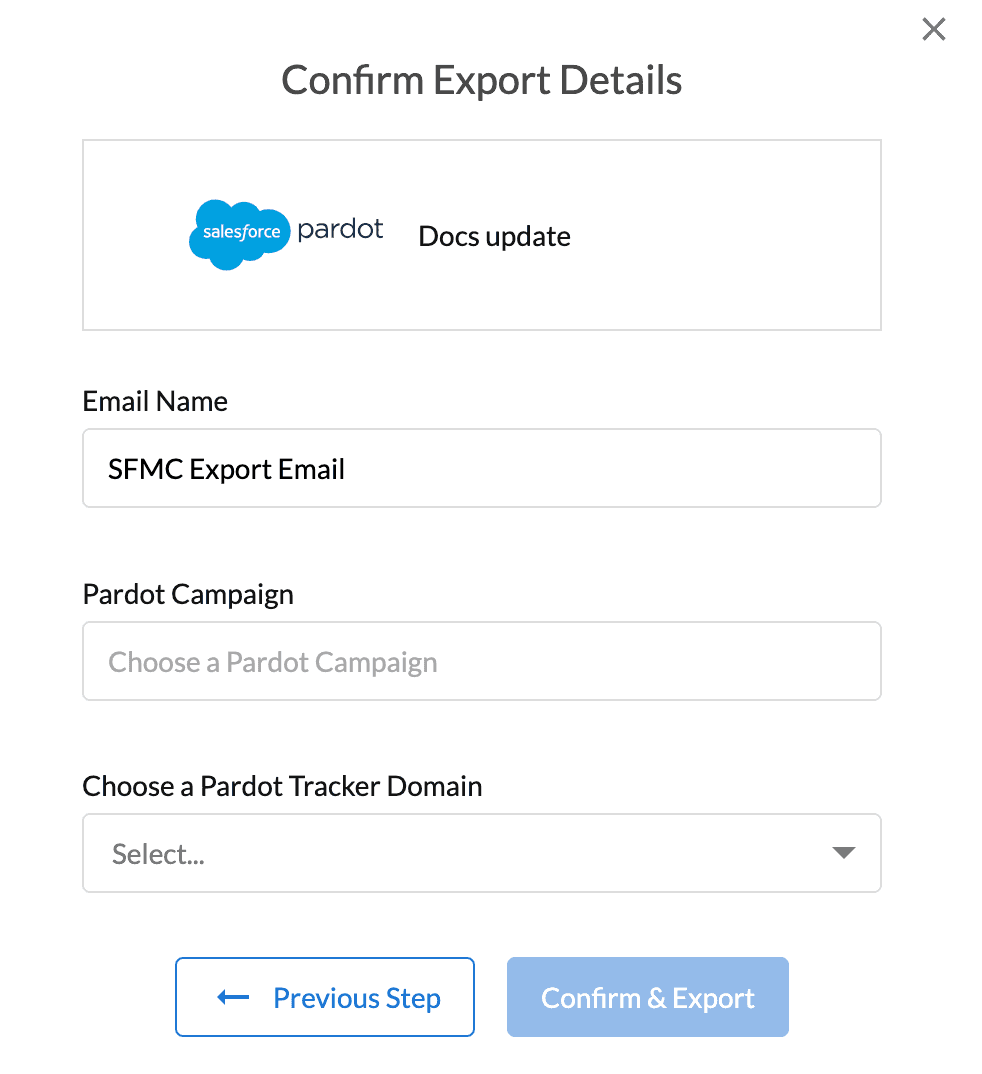
Add a “Pardot Campaign” and “Pardot Tracker Domain” and click Confirm & Export.
