# Exporting a Dyspatch Email to AWS Pinpoint
Build beautiful emails quickly with Dyspatch and send them to your customers
using Amazon's Pinpoint marketing service.
# Downloading Your Email Email
Once your email has been reviewed and [approved by your team's
stakeholders](/emails/submitting_an_email/#draft-approved), you can now
export your email using the **Export** button.
You will need to select the **HTML/Handlebars** option to be compatible with
Pinpoint's email system.

A zipped file will be downloaded onto your system with the HTML, plain text
content, metadata, and localizations (if applicable).
### Getting the HTML Source Code
AWS Pinpoint requires you to copy and paste HTML directly into their system. To
obtain the HTML source code for your email, you can open the HTML file in a
text editor or open the file in a web browser and view the page source.
#### Web Browser
Most web browsers will have a "View Page Source" option. The following
screenshots will outline steps for Google Chrome.
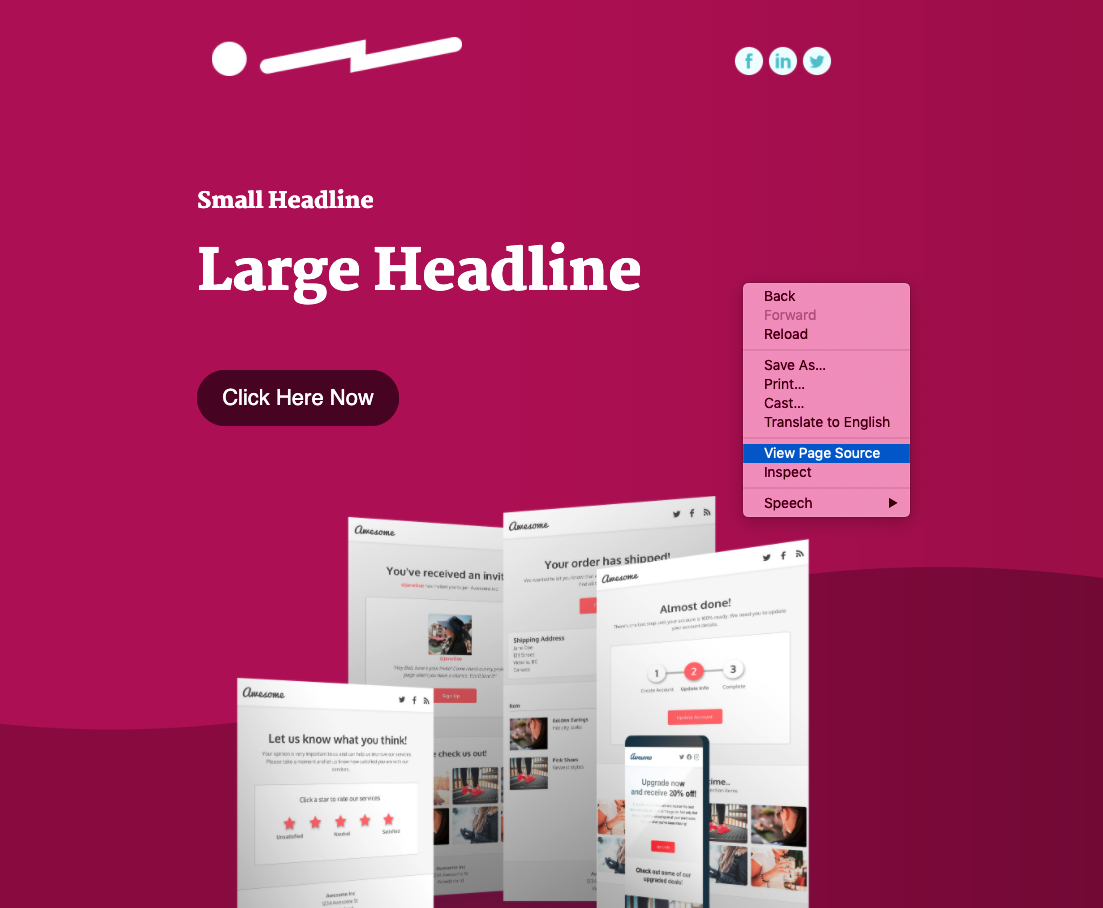
Open the HTML file in a web browser, and right click the page to open a drop
down menu. Select the **View Page Source** option.
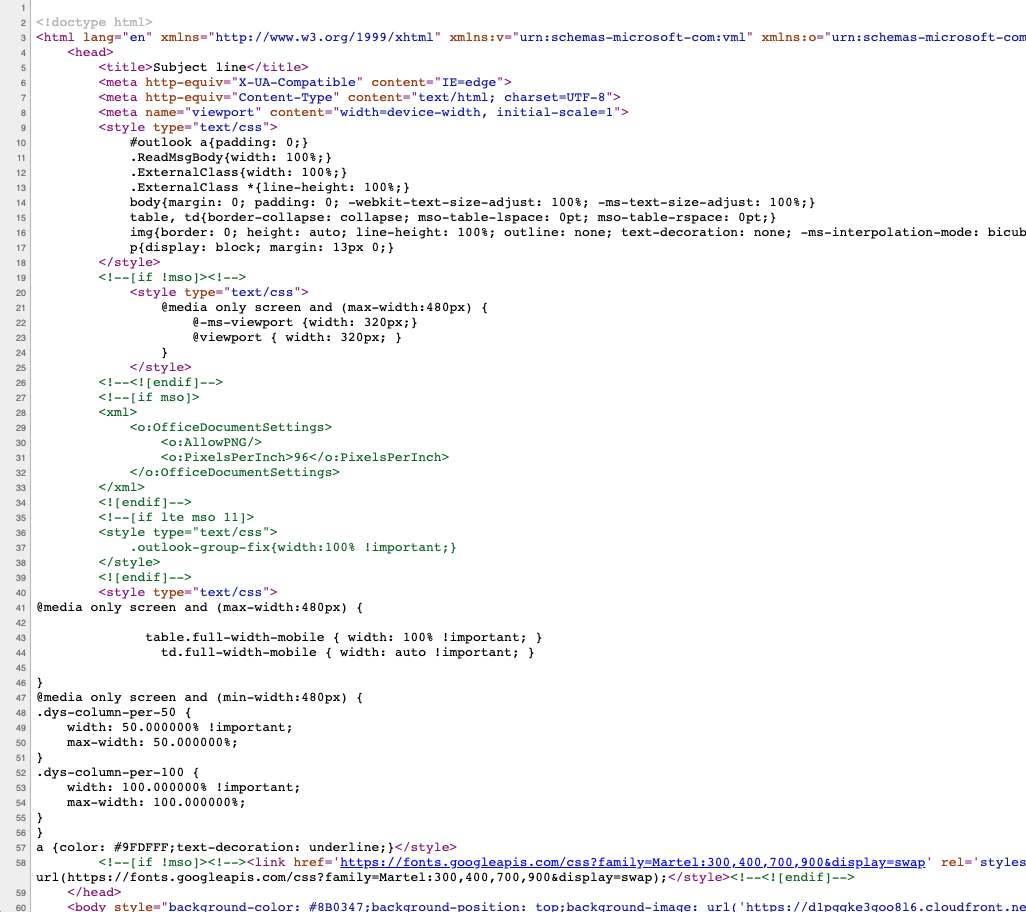
 You will be presented with the HTML source code and you can copy the HTML and
[add the content into
Pinpoint](/exports/export_to_pinpoint/#adding-your-dyspatch-email-to-pinpoint).
You will be presented with the HTML source code and you can copy the HTML and
[add the content into
Pinpoint](/exports/export_to_pinpoint/#adding-your-dyspatch-email-to-pinpoint).
 #### Text Editor
**Windows**
Notepad comes pre-installed with Windows operating systems, so you should be
able to search for Notepad and open the HTML file. Once opened, you can copy
the HTML and [add the content into
Pinpoint](/exports/export_to_pinpoint/#adding-your-dyspatch-email-to-pinpoint).
**MacOS**
TextEdit comes pre-installed with MacOS operating systems, so you should be
able to search for TextEdit and open the HTML file. Note that you may need to
adjust your preferences to allow HTML files to be opened in code format.
In the preferences settings, click the "Open and Save" tab. Make sure the
"Display HTML files as HTML code instead of formatted text" is enabled.
Once you have the HTML, you can copy the HTML and [add the content into
Pinpoint](/exports/export_to_pinpoint/#adding-your-dyspatch-email-to-pinpoint).
### Adding Your Dyspatch Email to Pinpoint
After you have the HTML code, go to AWS
Pinpoint in the AWS dashboard.
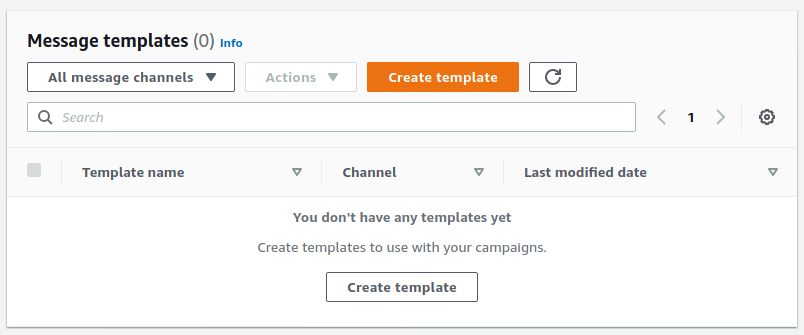
Next go to the "Message
templates" page and click "Create template".
#### Text Editor
**Windows**
Notepad comes pre-installed with Windows operating systems, so you should be
able to search for Notepad and open the HTML file. Once opened, you can copy
the HTML and [add the content into
Pinpoint](/exports/export_to_pinpoint/#adding-your-dyspatch-email-to-pinpoint).
**MacOS**
TextEdit comes pre-installed with MacOS operating systems, so you should be
able to search for TextEdit and open the HTML file. Note that you may need to
adjust your preferences to allow HTML files to be opened in code format.
In the preferences settings, click the "Open and Save" tab. Make sure the
"Display HTML files as HTML code instead of formatted text" is enabled.
Once you have the HTML, you can copy the HTML and [add the content into
Pinpoint](/exports/export_to_pinpoint/#adding-your-dyspatch-email-to-pinpoint).
### Adding Your Dyspatch Email to Pinpoint
After you have the HTML code, go to AWS
Pinpoint in the AWS dashboard.
Next go to the "Message
templates" page and click "Create template".
 To add your Dyspatch email into your Pinpoint template, first make sure that the
message type is **Email**, then fill out the **Template Name**. Next, look in the
metadata file to get the subject line. Lastly, copy and paste the HTML code into the
**Message** section.
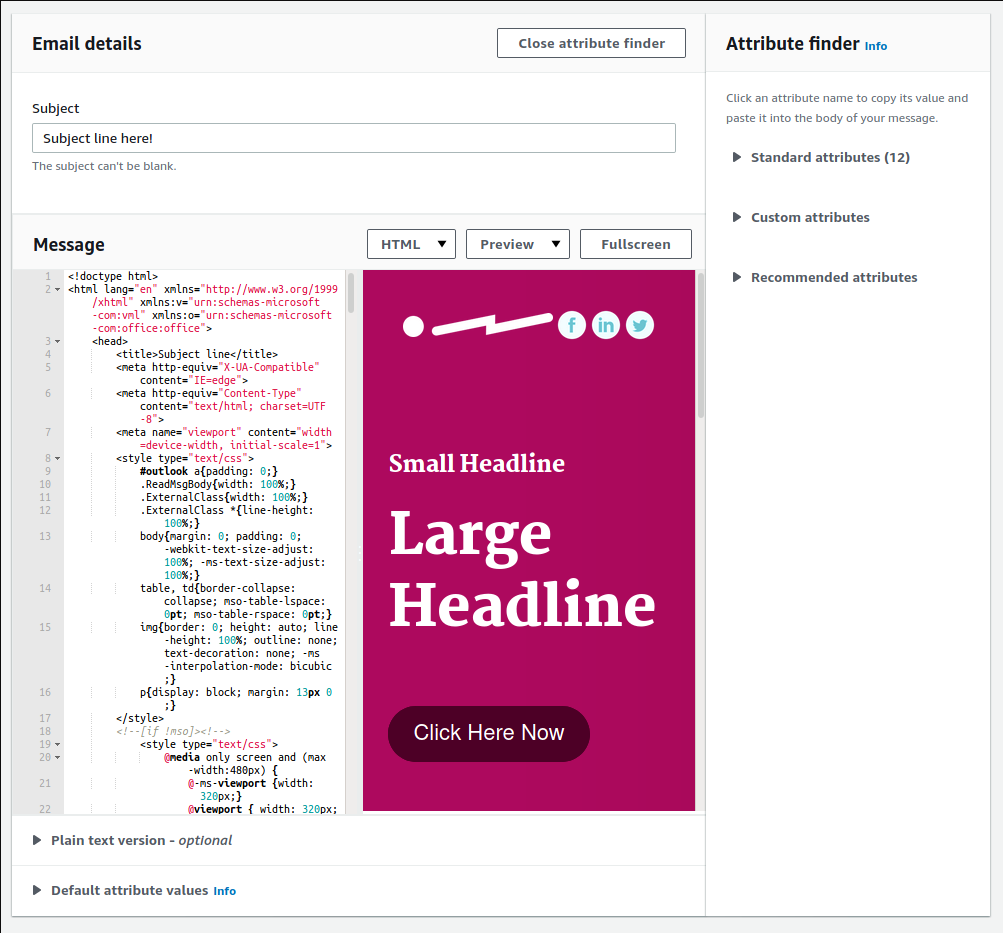
Click **Create** and you're done! You can now start sending this email through
AWS Pinpoint.
To add your Dyspatch email into your Pinpoint template, first make sure that the
message type is **Email**, then fill out the **Template Name**. Next, look in the
metadata file to get the subject line. Lastly, copy and paste the HTML code into the
**Message** section.

Click **Create** and you're done! You can now start sending this email through
AWS Pinpoint.