# Exporting a Dyspatch Email to SparkPost
After your email has been approved and published by your team, you are now able to export that email and add it into your sending platform. This guide will outline how to add your email to SparkPost.
## Downloading Your Email
Once your email has been reviewed and [approved by your team's stakeholders](/emails/submitting_an_email/#draft-approved), you can now export your email using the **Export** button.
Click the **Download Email** tab and select the **SparkPost** option to be compatible with SparkPost's templating system.
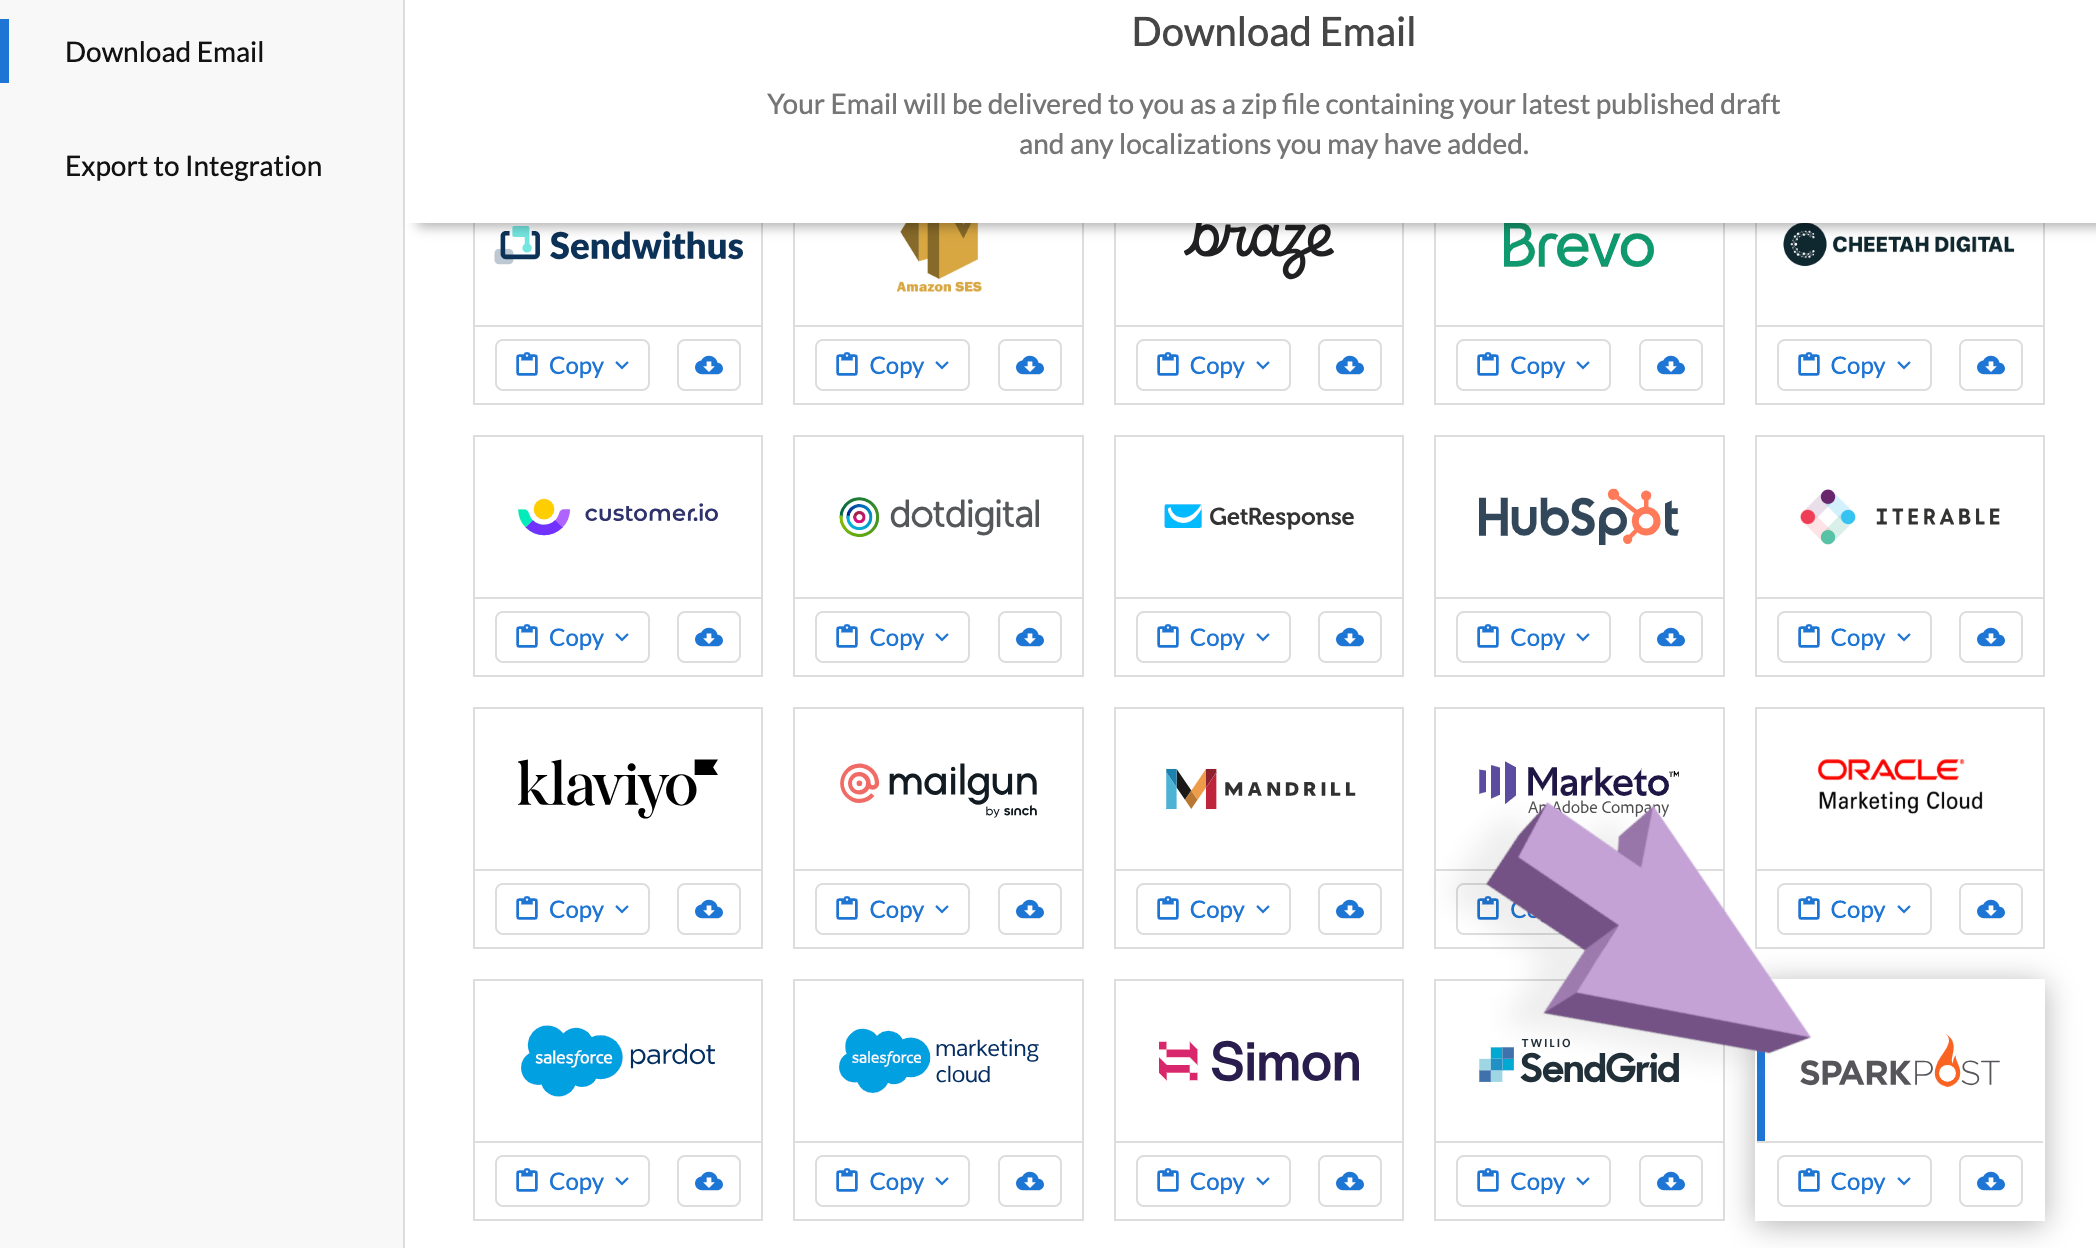 A zipped file will be downloaded onto your system with the HTML, plain text content, metadata, and localizations (if applicable).
Alternatively you can select **Copy > HTML** from the same Sparkpost export box.
### Getting the HTML Source Code
Adding your email into SparkPost requires you to copy and paste your email's HTML source code. To obtain this HTML if you downloaded the files, rather than copied them, unzip the folder downloaded from Dyspatch and open the HTML file so you can copy its contents to [add the email to SparkPost](/exports/export_to_sparkpost/#adding-the-email-to-sparkpost).
Here's how to open the HTML file and copy the HTML using your [web browser](/exports/export_to_sparkpost/#web-browser) or the [text editor](/exports/export_to_sparkpost/#text-editor) that is pre-installed with Windows and MacOS.
#### Web Browser
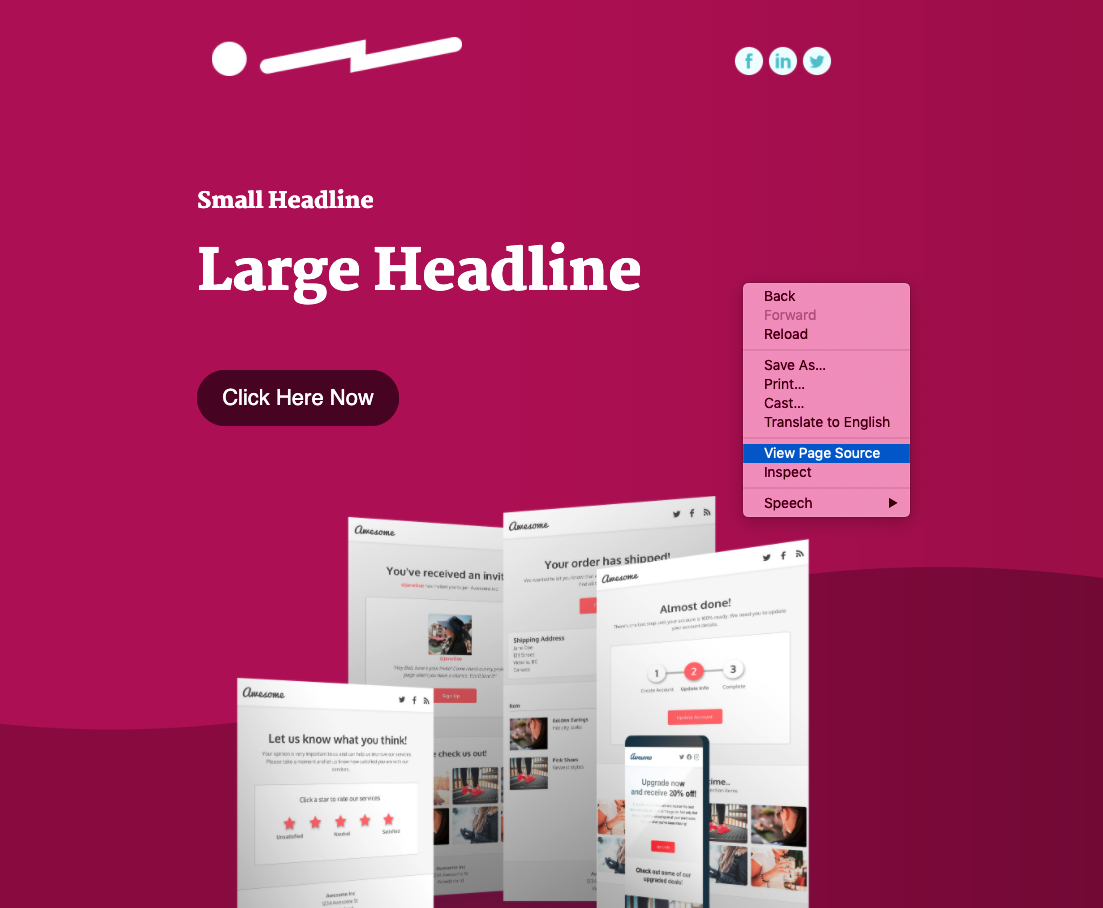
Most web browsers will have a "View Page Source" option. The following screenshots will outline steps for Google Chrome.
Open the HTML file in a web browser, and right click the page to open a drop down menu. Select the **View Page Source** option.
A zipped file will be downloaded onto your system with the HTML, plain text content, metadata, and localizations (if applicable).
Alternatively you can select **Copy > HTML** from the same Sparkpost export box.
### Getting the HTML Source Code
Adding your email into SparkPost requires you to copy and paste your email's HTML source code. To obtain this HTML if you downloaded the files, rather than copied them, unzip the folder downloaded from Dyspatch and open the HTML file so you can copy its contents to [add the email to SparkPost](/exports/export_to_sparkpost/#adding-the-email-to-sparkpost).
Here's how to open the HTML file and copy the HTML using your [web browser](/exports/export_to_sparkpost/#web-browser) or the [text editor](/exports/export_to_sparkpost/#text-editor) that is pre-installed with Windows and MacOS.
#### Web Browser
Most web browsers will have a "View Page Source" option. The following screenshots will outline steps for Google Chrome.
Open the HTML file in a web browser, and right click the page to open a drop down menu. Select the **View Page Source** option.
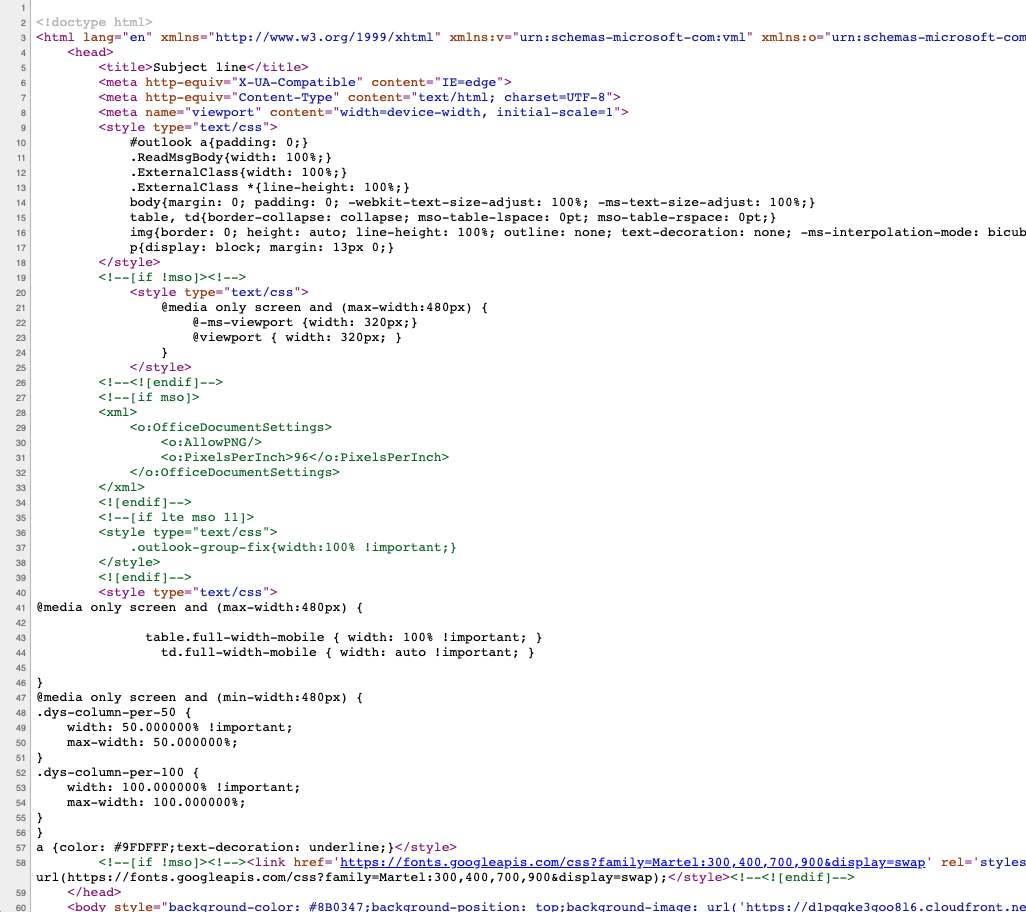
 You will be presented with the HTML source code and you can copy the HTML and [add the content into SparkPost](/exports/export_to_sparkpost/#adding-the-email-to-sparkpost).
 #### Text Editor
**Windows**
Notepad comes pre-installed with Windows operating systems, so you should be able to search for Notepad and open the HTML file. Once opened, you can copy the HTML and [add the content into SparkPost](/exports/export_to_sparkpost/#adding-the-email-to-sparkpost).
**MacOS**
TextEdit comes pre-installed with MacOS operating systems, so you should be able to search for TextEdit and open the HTML file. Note that you may need to adjust your preferences to allow HTML files to be opened in code format.
In the preferences settings, click the "Open and Save" tab. Make sure the "Display HTML files as HTML code instead of formatted text" is enabled.
Once you have the HTML, you can copy the HTML and [add the content into SparkPost](/exports/export_to_sparkpost/#adding-the-email-to-sparkpost).
## Adding the Email to SparkPost
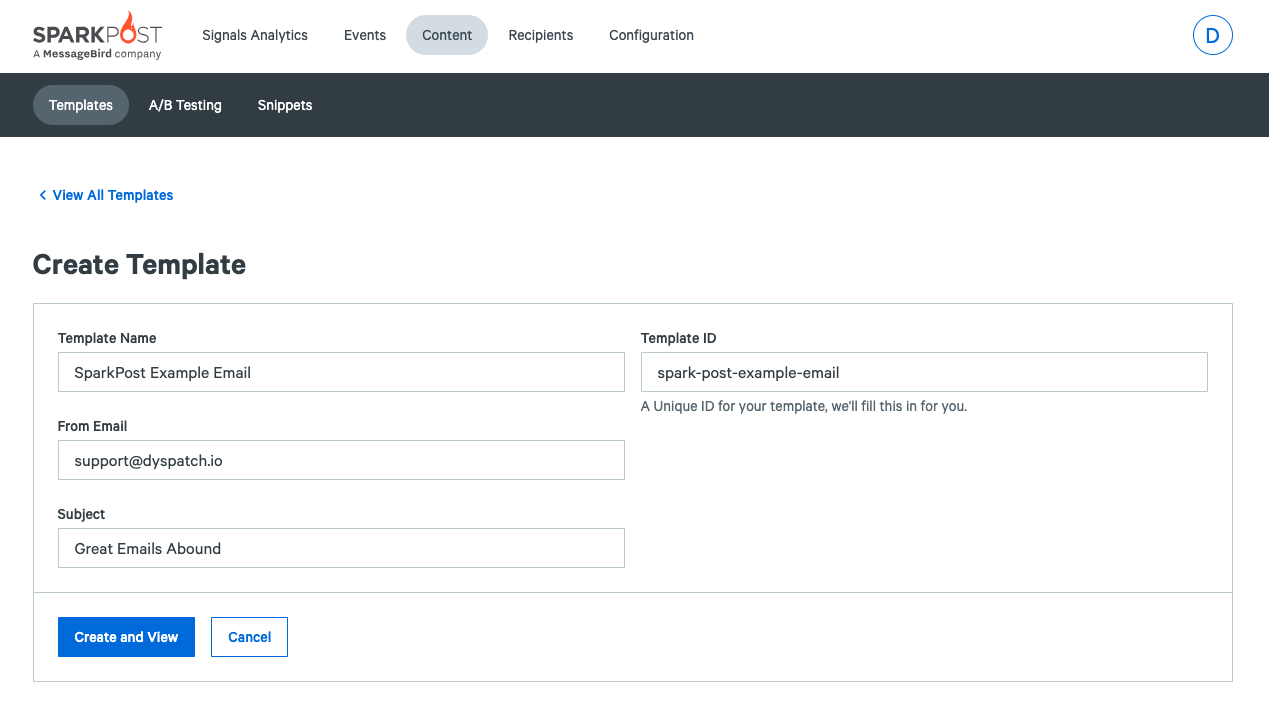
In SparkPost, navigate to the **Content** section and select Templates. Click the **Create Template** button.
Add in a Template Name, a verified sending domain for the from email address, and a subject line. Assign an account to send from and click **Create and View**.
In the SparkPost email editor, make sure you are in the HTML tab and paste in the [HTML source code](/exports/export_to_sparkpost/#getting-the-html-source-code) into the editor.
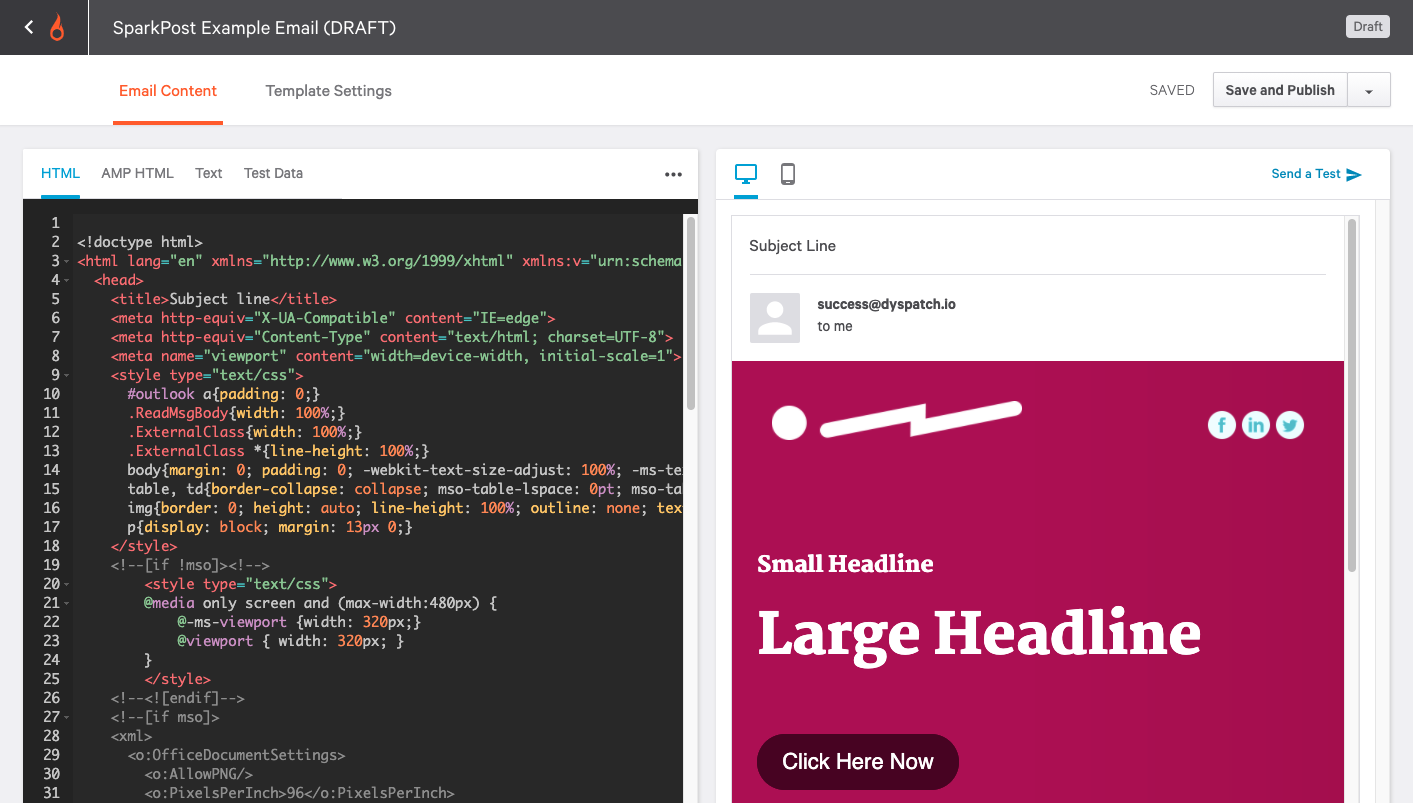
Once you have added your email in SparkPost, there will be a preview of the email on the right side of the screen.
From here, ensure that you have added any **AMP HTML**, Plain **Text** Content, or **Test Data** to preview the templating logic.
Additionally, make sure to review the **Template Settings**, which is where you can update the _Subject Line_, set a _From Name_ and _Reply To_ address, and set your tracking settings for the email.
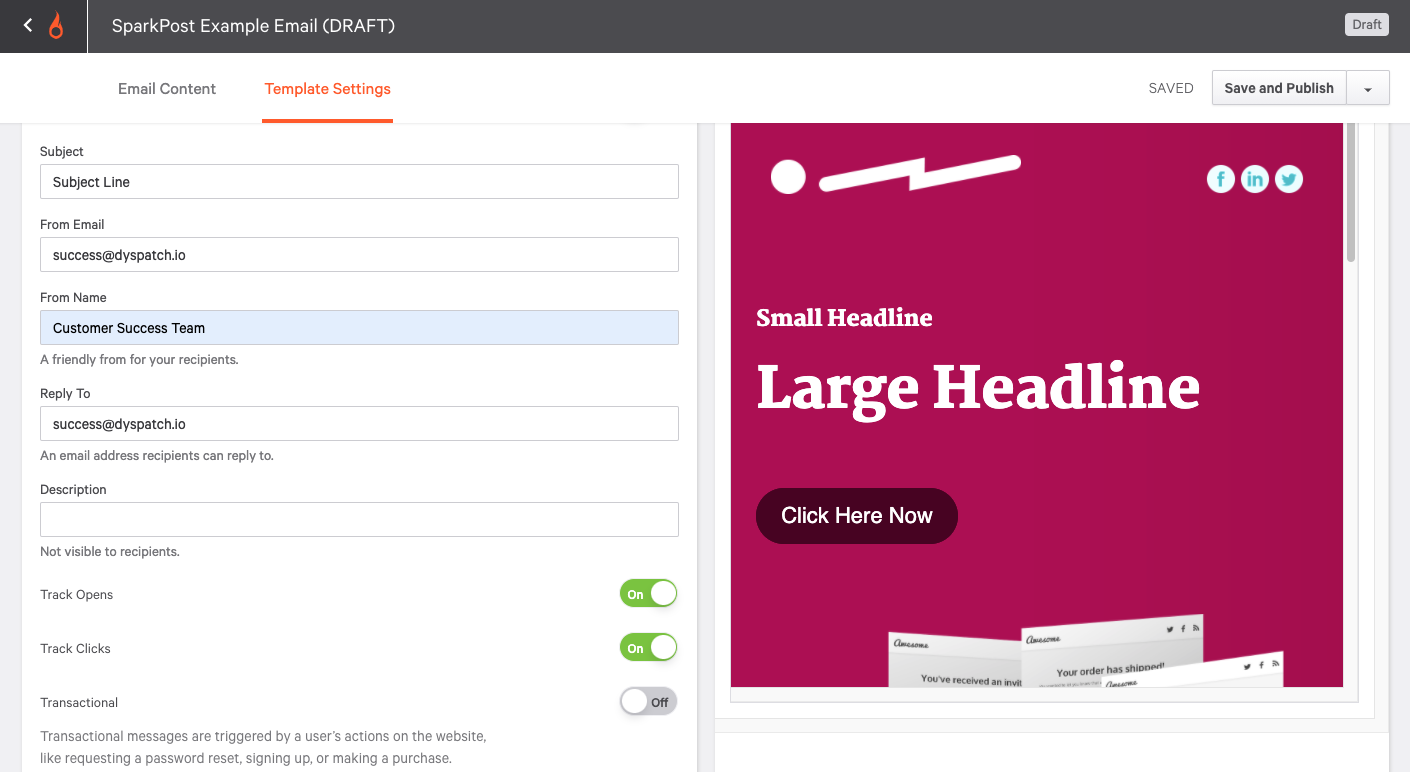
After testing your email with the templating logic and updating template settings, you can now **Save and Publish** your template draft.
All set! You can now use this email to start sending engaging email messages to your customers through SparkPost!
#### Text Editor
**Windows**
Notepad comes pre-installed with Windows operating systems, so you should be able to search for Notepad and open the HTML file. Once opened, you can copy the HTML and [add the content into SparkPost](/exports/export_to_sparkpost/#adding-the-email-to-sparkpost).
**MacOS**
TextEdit comes pre-installed with MacOS operating systems, so you should be able to search for TextEdit and open the HTML file. Note that you may need to adjust your preferences to allow HTML files to be opened in code format.
In the preferences settings, click the "Open and Save" tab. Make sure the "Display HTML files as HTML code instead of formatted text" is enabled.
Once you have the HTML, you can copy the HTML and [add the content into SparkPost](/exports/export_to_sparkpost/#adding-the-email-to-sparkpost).
## Adding the Email to SparkPost
In SparkPost, navigate to the **Content** section and select Templates. Click the **Create Template** button.
Add in a Template Name, a verified sending domain for the from email address, and a subject line. Assign an account to send from and click **Create and View**.

In the SparkPost email editor, make sure you are in the HTML tab and paste in the [HTML source code](/exports/export_to_sparkpost/#getting-the-html-source-code) into the editor.

Once you have added your email in SparkPost, there will be a preview of the email on the right side of the screen.
From here, ensure that you have added any **AMP HTML**, Plain **Text** Content, or **Test Data** to preview the templating logic.
Additionally, make sure to review the **Template Settings**, which is where you can update the _Subject Line_, set a _From Name_ and _Reply To_ address, and set your tracking settings for the email.

After testing your email with the templating logic and updating template settings, you can now **Save and Publish** your template draft.
All set! You can now use this email to start sending engaging email messages to your customers through SparkPost!