Target dark mode using custom styles to ensure your emails are beautiful and accessible for everyone.
Applying dark mode specific styles is quick to implement and test in Dyspatch, meaning you can implement dark mode early in your design process and maintain it across all your emails emails.
Adding Custom Dark Mode Styles in Dyspatch
Add Dark Mode Styling to a Theme
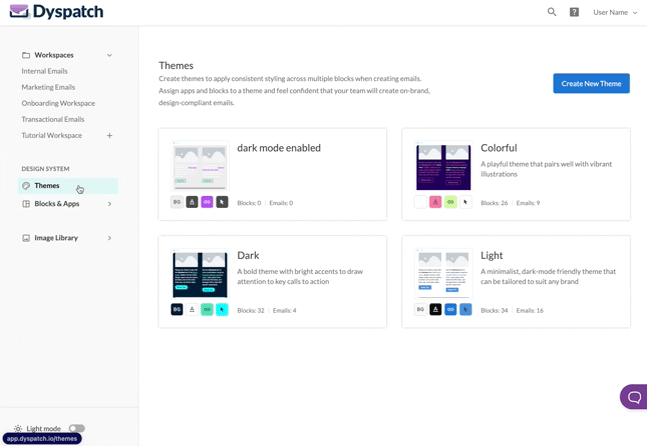
Every email in Dyspatch is assigned to a theme, which houses default styling for all elements assigned to it. To add custom styles, such as dark mode specific media queries, first pick the theme from your Themes list.
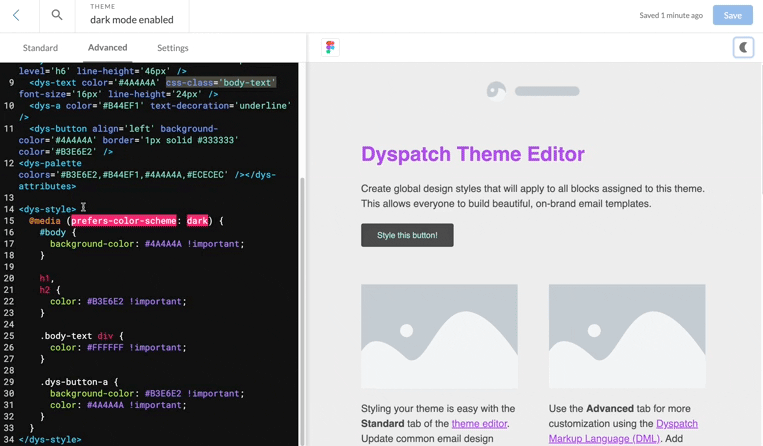
In the theme's Advanced tab, add a <dys-style> tag outside of the <dys-attributes> tag, and include your custom styling.
<dys-style>
  <dys-comment>Custom styling goes here</dys-comment>
  @media (prefers-color-scheme: dark) {
    #body {
      background-color: #4A4A4A !important;
    }
    h1, h2 {
      color: #B3E6E2 !important;
    }
  }
</dys-style>
Add Dark Mode Styling to a Block
Use the <dys-style> tag inside of a <dys-block> for one-off scenarios.
Styles declared inside of a block will be included in the head of the email. They may be applied to elements outside of the block if the selector or CSS class is not unique.

Example:
<dys-block>
  <dys-style>
    @media (prefers-color-scheme: dark) {
      .custom h2 {
        background-color: #000000;
        color: #ffffff !important;
      }
    }
  </dys-style>
  <dys-row>
    <dys-column>
      <dys-title css-class='custom' font-size='24px'>
        Block Specific Dark Mode
      </dys-title>
    </dys-column>
  </dys-row>
</dys-block>
Email Client Specific Dark Mode Targeting
Many email clients and devices can be targeted with the following style inclusions.
Using the @media Query
By including the @media (prefers-color-scheme: dark) query you can set darkmode styles for Apple Mail, iOS Mail, and some webview clients including some versions of Outlook.
<dys-style>
  @media (prefers-color-scheme: dark) {
    .custom h2 {
      background-color: #000000;
      color: #ffffff !important;
    }
  }
</dys-style>Dark Mode in Gmail
Unfortunately, Gmail (Android and iOS) and Outlook 2019 for Windows don't support either @media queries or any other targeting method. Instead, they do a full invert of all colors in your email. By testing dark mode early and often, you can make adjustments to your design with dark mode in mind, including safeguarding images and logos for darkmode.
Using the Dark Mode Preview Button in the Email Builder and Theme Editor
While editing your theme, or building your email, you can toggle on dark mode preview with the moon icon above the email preview. This will enable all styles declared inside of an @media query in the preview.
Safeguarding Images and Logos for Dark Mode
To ensure your emails are legible and look good in dark mode across different email clients, it's best to optimize your images and logos for all possible scenarios.
Include a Border as Part of your Images
Adding a contrasting color as part of the image surrounding your logos and images will ensure that any form of inversion will still provide a clear separation between the background color and image content. This is especially ideal for dark or light logos.
Below is a Device Preview of the Dyspatch logo over a white background, as seen by dark mode users of Outlook Office 365. The logo on the left has no border added in the PNG image, making the dark areas blend into the background. The logo on the right has a 5px white border around the logo as part of the PNG image, which isn't inverted, keeping legibility and branding.

Targeting Specific Elements
Targeting dys-text Elements
<dys-text> elements must have a CSS class applied to them to be targeted specifically. To add a class to all dys-text elements in an email, include the css-class="<your-class-name>" attribute to the dys-text element in the theme. You can name your class whatever makes sense to you. In the following example it's named body-text.
<dys-text color='#4A4A4A' css-class='body-text' font-size='16px' line-height='24px' />The class of body-text will be added to the outer div of all dys-text areas in your email. Target the div inside of that class in your dys-style declaration to specify the dark mode styles.
<dys-style>
  @media (prefers-color-scheme: dark) {
    .body-text > div {
      color: #FFFFFF !important;
    }
  }
</dys-style>

Further Reading
Find more detailed information on optimizing images and content for dark mode in thisThe Dangers of Dark Mode for Email article.
Ensure you're getting the most out of Dyspatch by utilizing the built in Device Previews.
View the DML-101 dys-style documentation to learn more about using custom CSS in Dyspatch.