# Using Customer Profiles to Preview Emails
Simulate customer cohorts or key business scenarios and preview emails with profiles applied to ensure that the right customer sees the right content.
## Creating Customer Profiles
In order to create a customer profile, you must have either [Admin or Developer permissions](../../administration/dyspatch_roles/).
### Create and Edit a Customer Profile by Name and Placeholder

1. Select **Data** from the [administration dashboard](https://app.dyspatch.io/admin/).
2. Select the **Customer Profiles** tab and click **Add Profile**.
3. Name your Customer Profile, provide an optional description, and **Create Profile**.
4. Add your profile's properties as key value pairs. Add the key in the **Name** field, and the value in the **Placeholder Value** field. Duplicate a row to add more properties.
### Create and Edit a Customer Profile as JSON

You can input or edit your Customer Profile data in JSON format by toggling **Show JSON Editor**.
Keys/Names in JSON do not contain spaces.
#### Assigning Customer Profiles to a Workspace
Keep your workspaces organized by assigning customer profiles and customer profile folders to workspaces.
Select the " " menu next to the profile or folder and select **Manage Workspaces**. Toggle a workspace to **Active** to use that customer profile, or all profiles in a folder, in that workspace.

If you'd like your data set accessible to all workspaces, consider using Global Variables alongside different customer profiles
## Using Customer Profiles
Customer Profiles, as well as [Global Variables](#using-global-variables) and email specific [Preview Data](/emails/testing_your_email_with_preview_data/#building-preview-data-using-the-data-builder), can be used to build and preview dynamic copy, urls, and different blocks of an email.
### Adding Dynamic Variables to an Email
Use your company's data by adding dynamic variables as values by wrapping the variable name inside of an "@{}". This can be used for copy, metadata, urls, and anything else your ESP supports.

DML variables export to different languages without changing your Dyspatch email so you're not locked into one ESP or templating language.
### Render Blocks Dynamically with Conditionals
To increase user engagement, many organizations use customer data to offer their customers a tailored email based on their preferences or account status.

Select a block in the Email Builder and **Add Logic** to the **Display Options**. When a user's data makes the condition set on the block true, the block will be rendered.
See more about [using conditionals here](/emails/using_conditionals/).
## Previewing Emails with Customer Profiles
### Previewing Dynamic Content in the Email Builder
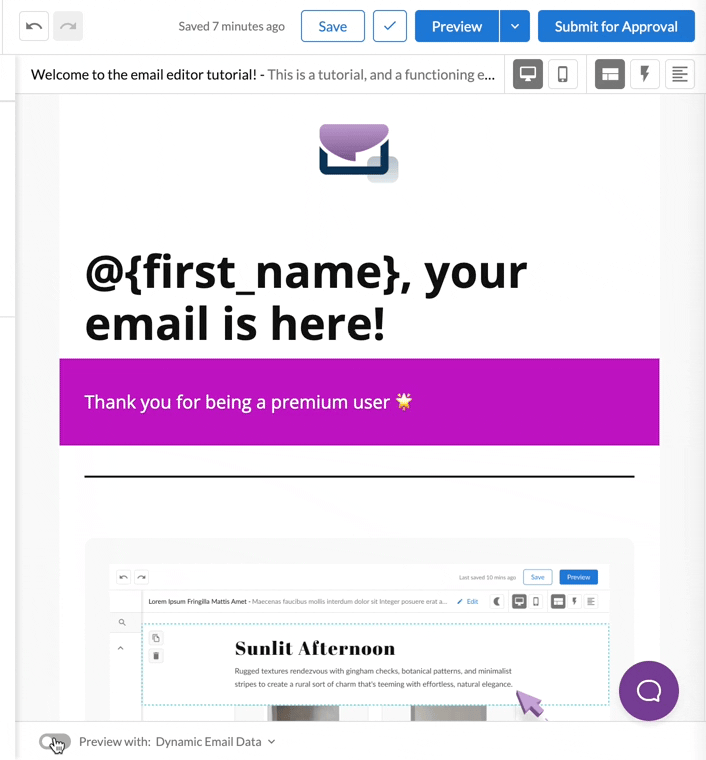
After you have created your email, you can preview the email using a Customer Profile. This will use all the values associated with that profile.
1. Toggle on Preview with: at the bottom of the Email Builder
2. Select the Customer Profile you'd like to preview
The email preview will be updated with the data from your customer profile.
### Previewing Dynamic Content in Device Previews

Select a Customer Profile as your **Content** when generating device previews or sending test emails to see exactly what you're communicating to your customers.
Preview Data is an alternative to Customer Profiles that is stored in an individual email, for unique and one-off emails.
## Using Global Variables
If you'd like your entire organization testing off of the same default data set, an *Admin* or *Developer* can include Global Variables the same way as Customer Profiles, but on the admin data page. These variables work the same as Customer Profiles with the added benefit of being always available to all emails in all workspaces.
Global Variable names/keys also provide auto-population when adding DML variables in the *rich text editor* of the email builder.
View more on [Testing with Device Previews](/emails/testing_with_device_previews/).
 The email preview will be updated with the data from your customer profile.
### Previewing Dynamic Content in Device Previews

Select a Customer Profile as your **Content** when generating device previews or sending test emails to see exactly what you're communicating to your customers.
The email preview will be updated with the data from your customer profile.
### Previewing Dynamic Content in Device Previews

Select a Customer Profile as your **Content** when generating device previews or sending test emails to see exactly what you're communicating to your customers.