Connect your HubSpot account to Dyspatch and begin exporting emails in a couple of clicks.
In order to connect your HubSpot account, you will first need to create a new Private App in Hubspot.
Create a Private Hubspot App
In HubSpot, click on the settings gear icon located near the top right corner.
In the left side panel, under the "Account Management" section, select the Integrations > Private Apps.
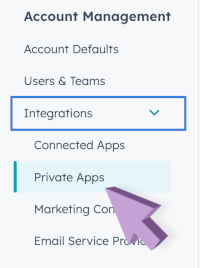
Click the Create a private app button and fill in the values below:
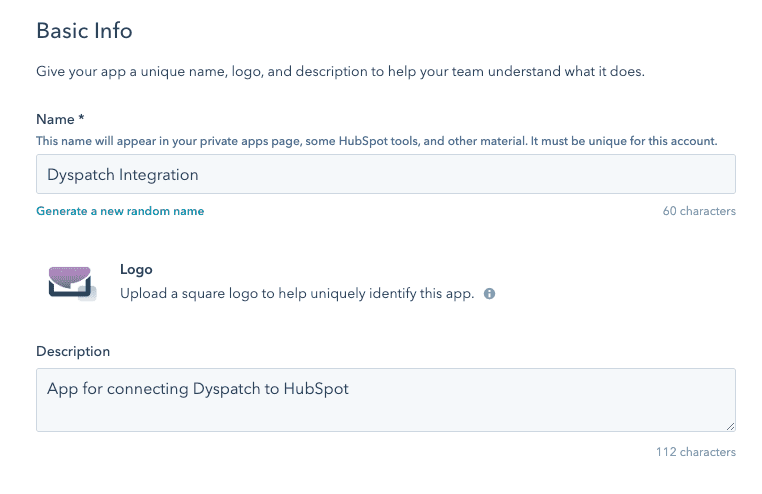
- Name: Name of your app (e.g. Dyspatch Integration)
- Icon: Optionally add an icon (e.g.
https://www.dyspatch.io/wp-content/uploads/2022/11/dyspatch-icon.png) - Description: Description of your app (e.g. App for connecting Dyspatch to HubSpot)
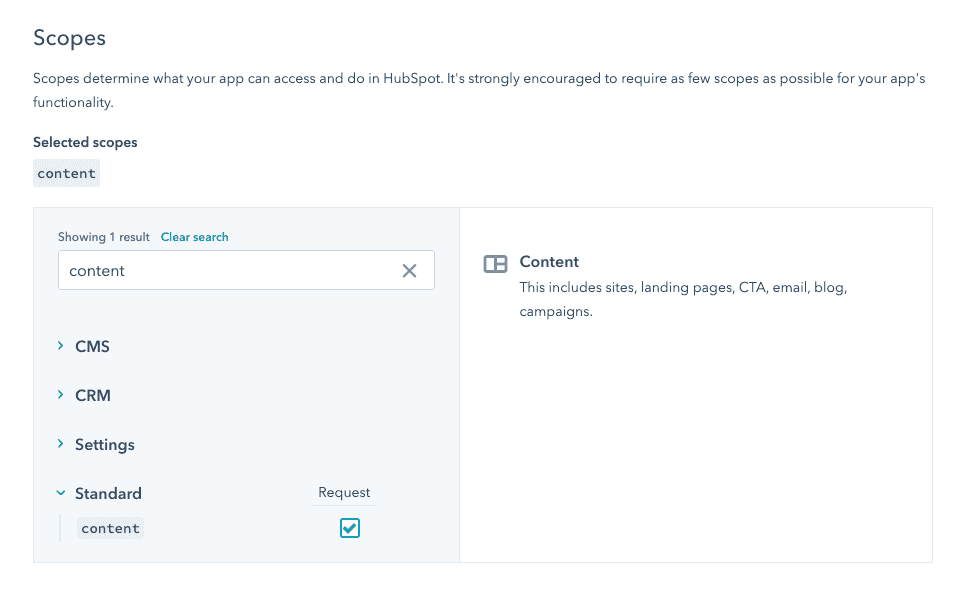
- Scopes: Required scopes to include are:
- Standard > Content
- CRM > Objects > Contacts > Read
- CRM > Objects > Contacts > Write
Click the Create app button once completed.
You will be presented with an "Access Token". Save this token for the steps below.
Connect HubSpot to Dyspatch
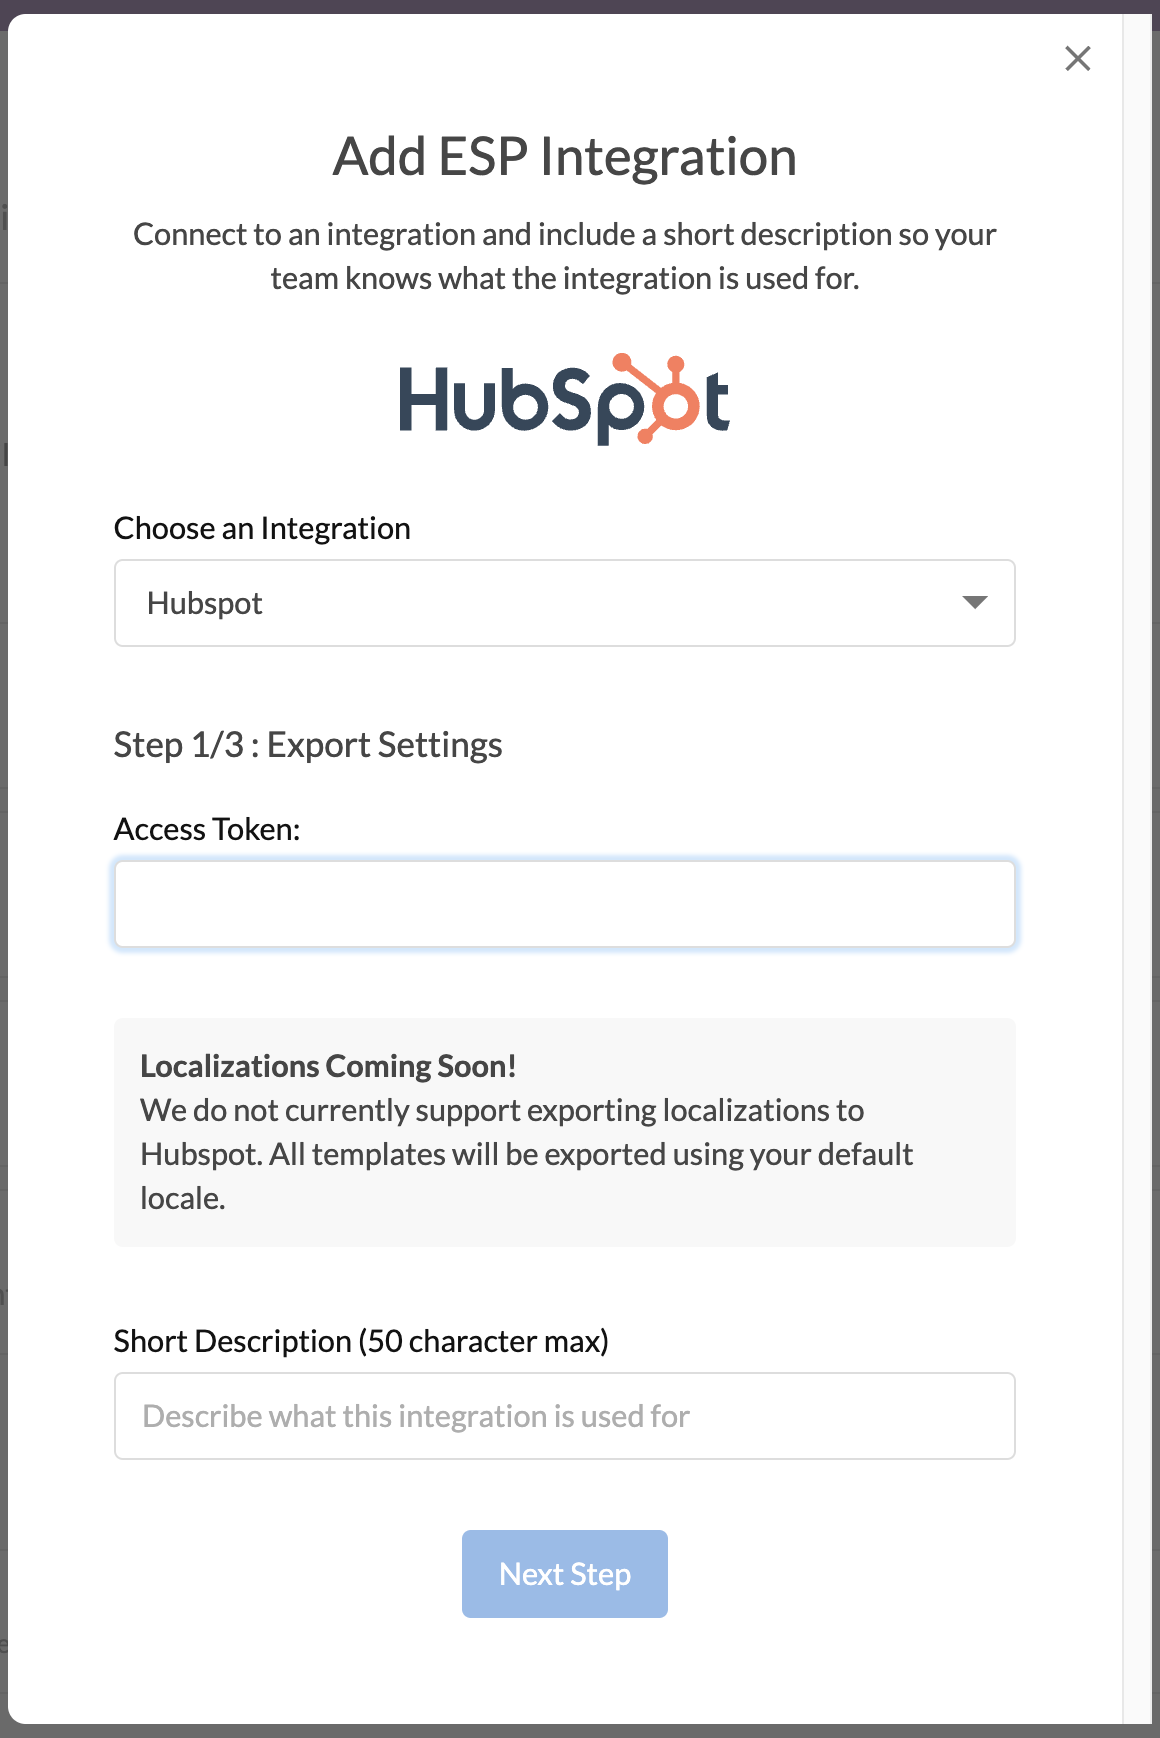
In the "Choose an Integration" drop down menu, select HubSpot.
Enter your unique Access Token created from the Hubspot Private app, and add a short description for your integration.
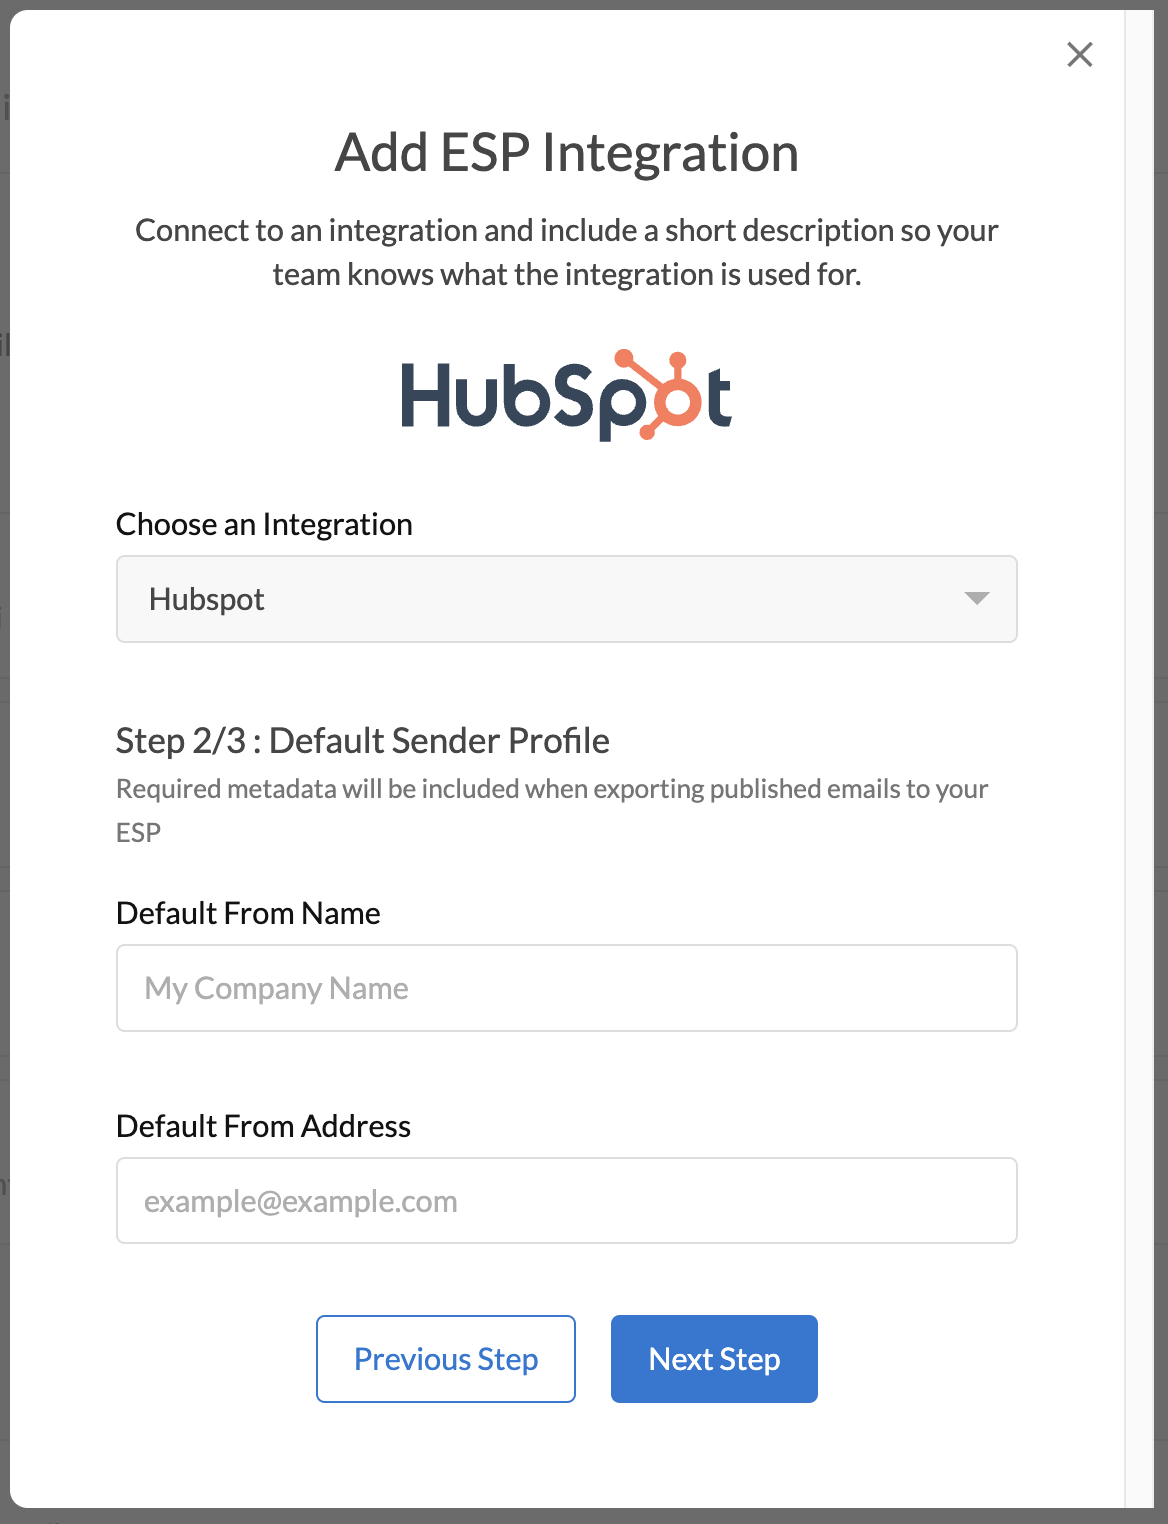
Add a Sender Profile, with default from address and from name to use on export.
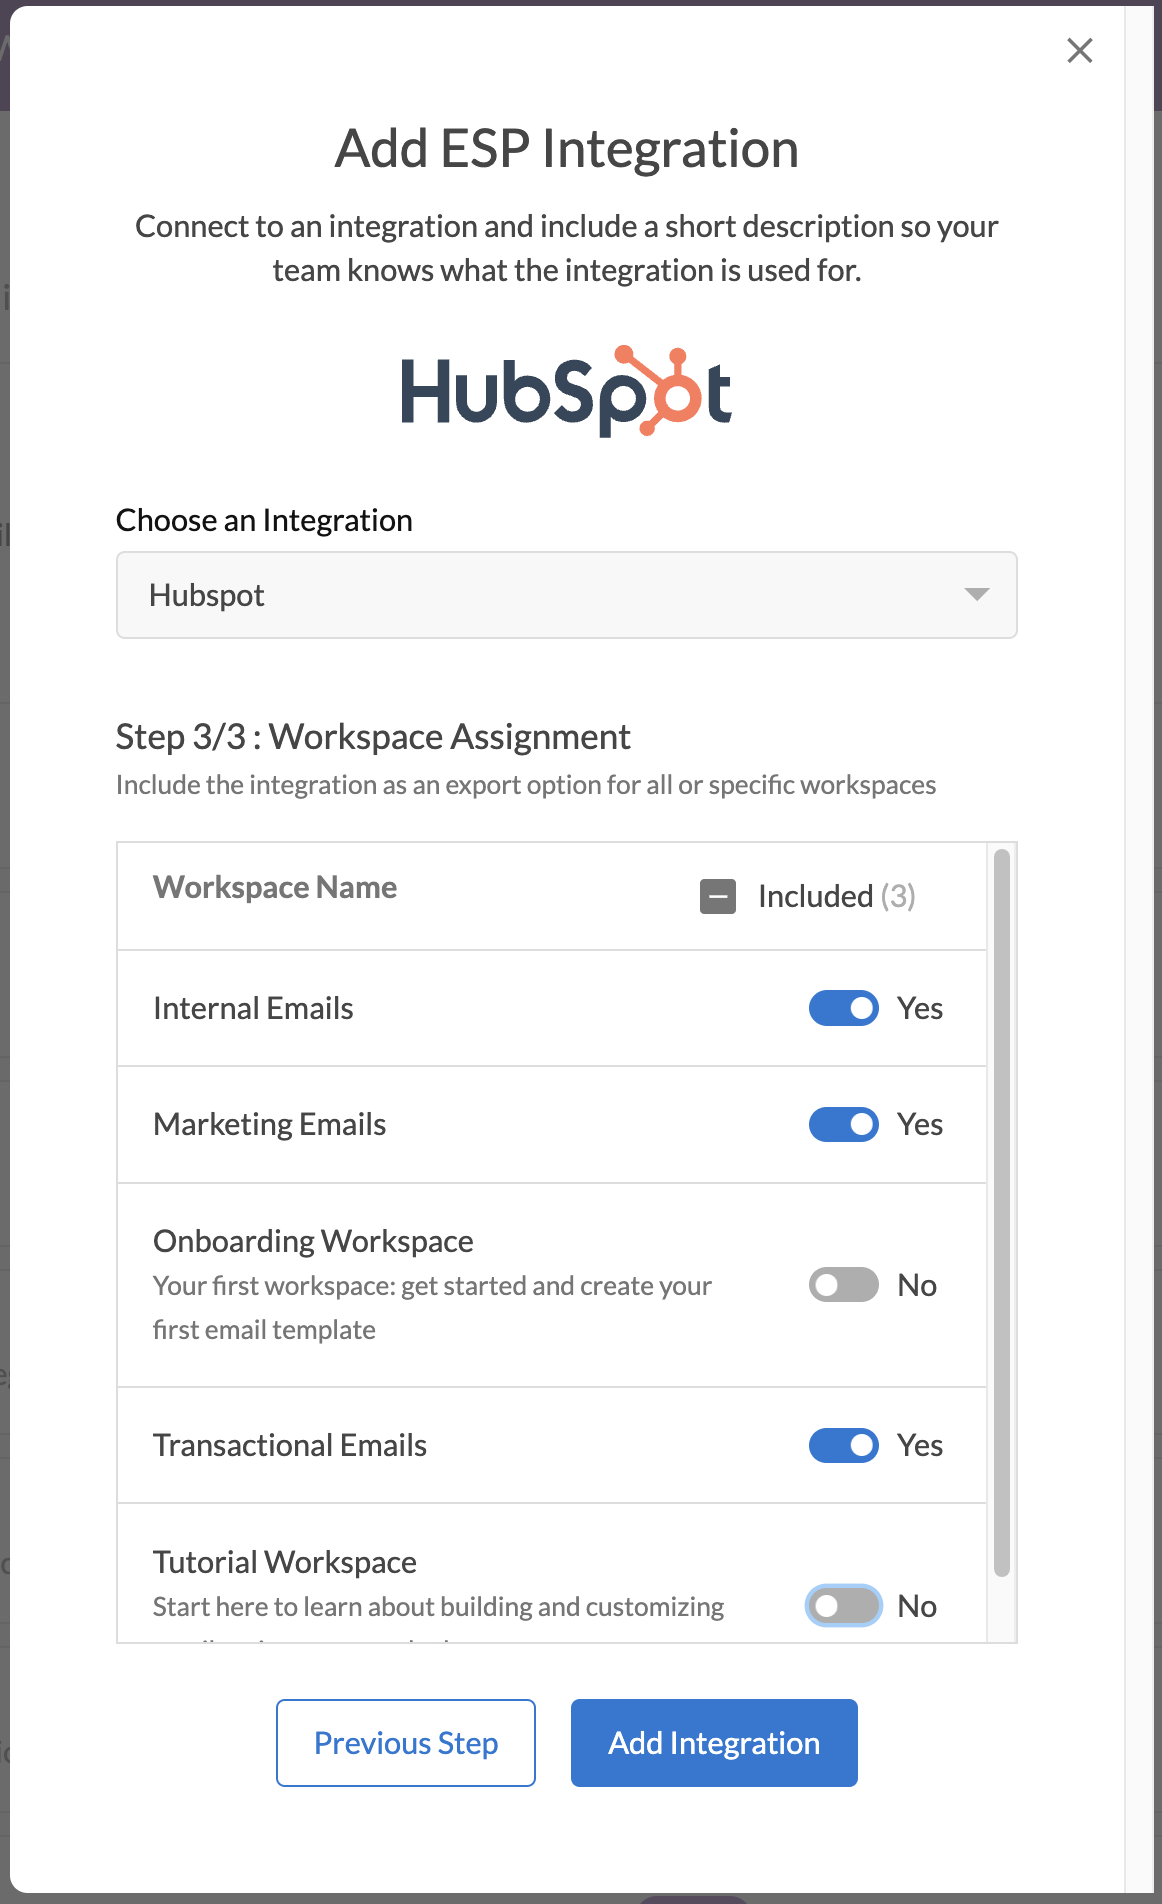
Assign all Workspaces where this integration is to be used.
Once your new integration has been set up, you will be able to export your emails to HubSpot directly from Dyspatch.