Connect your Iterable account to Dyspatch and begin exporting emails in a couple of clicks.
Create Iterable API Key
You will need to create an Iterable API key of type Server-side. Copy and save your API key value when you create it, you'll need it to set up your Iterable integration in Dyspatch.
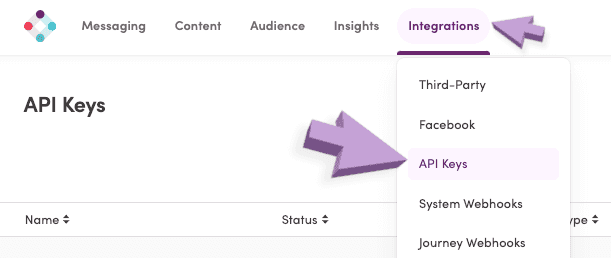
Establish Iterable Direct Integration
Select Add Integration on the Admin > Integrations page in Dyspatch.

Iterable Direct Integration Settings
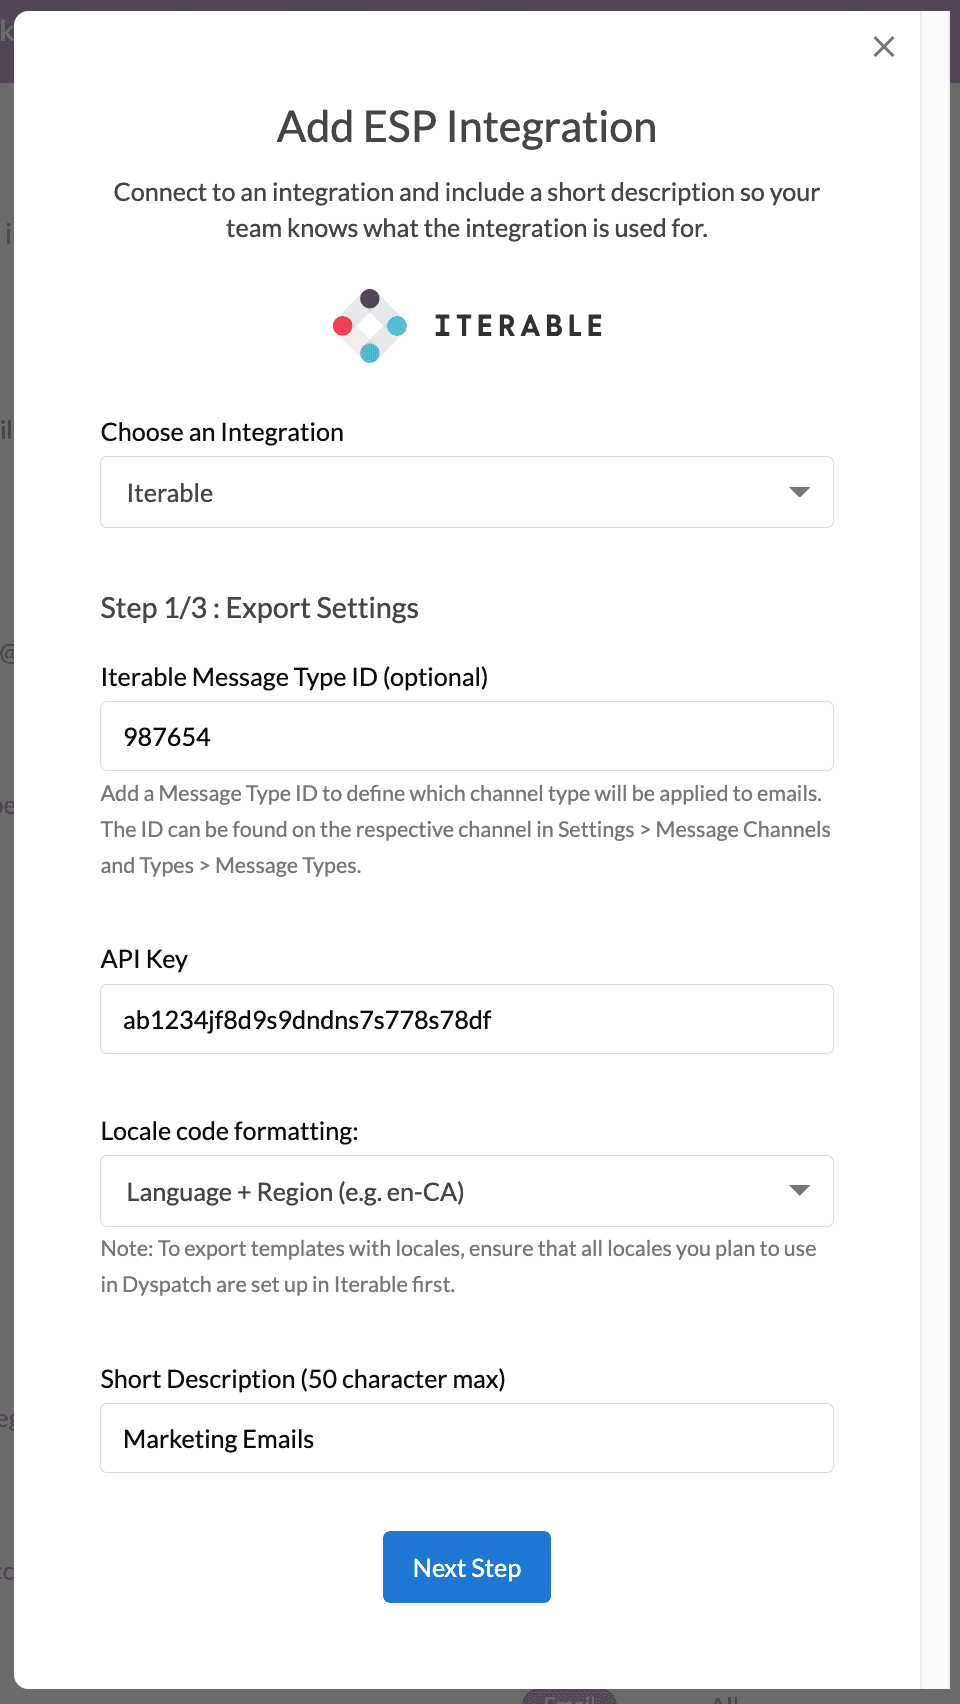
Add your optional Mesage Type ID, API key value, locale code formatting preference, and a short description for your team to diferentiate between possible multiple ESP integrations.
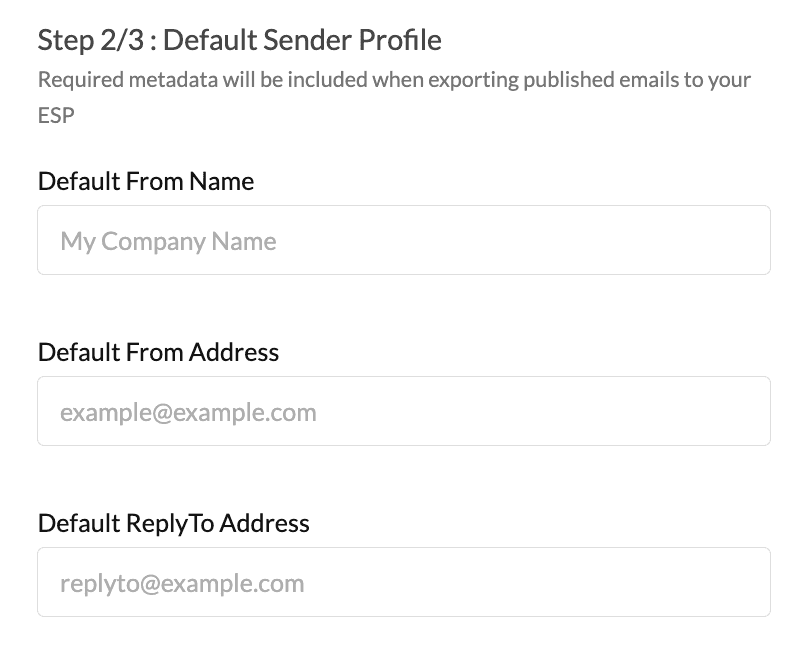
Next, include the default from name, email address, and reply to email.
These settings can be overridden on a per-email basis on the metadata tab in the email builder.
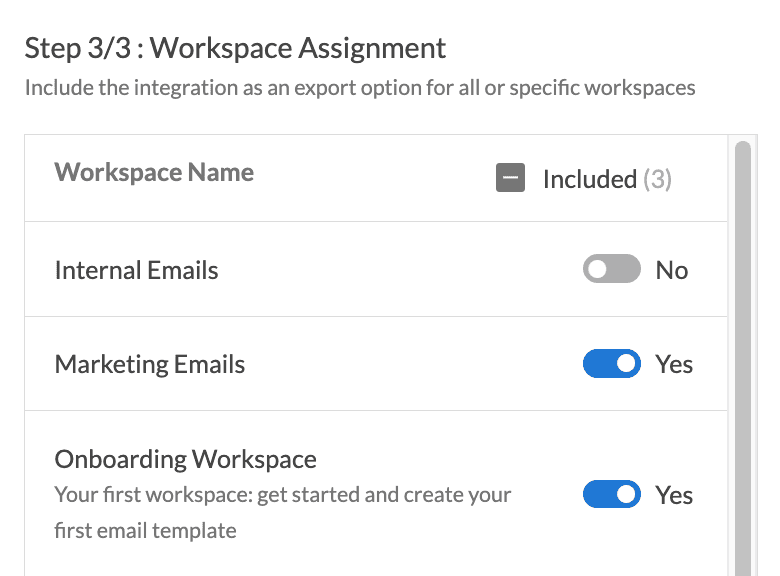
Lastly, toggle on the workspaces you'd like to enable exporting with this integration from, and click add integration.
Your team is now ready to export emails directly from Dyspatch to your Iterable account.
Using Iterable Message Type ID
To define which channel type will be applied to emails, marketing or transactional, add a Message Type ID. This feature allows your to declare the channel you emails should be sent though.
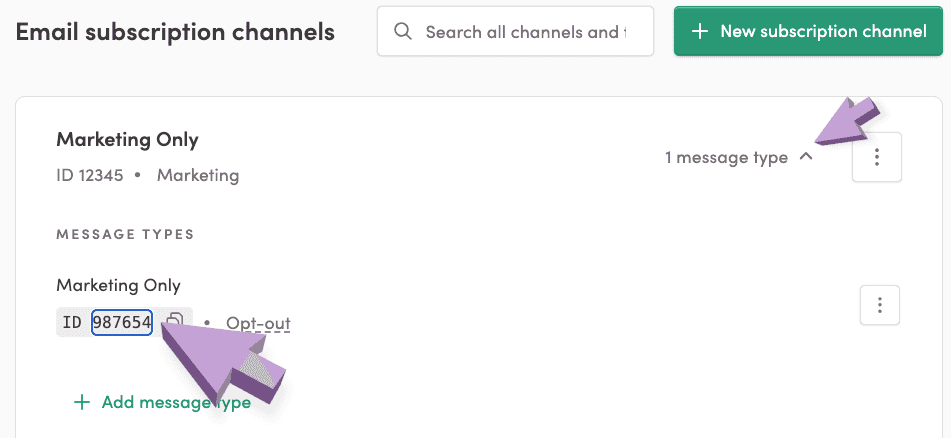
The ID can be found in your Iterable account under Settings > Message Channels and Types > Message Types. Copy over the ID code from the Message Type, not the Channel ID.
Localized Email Export Methods
Use Dyspatch to localize your email and you can create emails that support multiple languages or locations. With your new Iterable integration, you can choose to export localized emails with the Iterable property Locale.
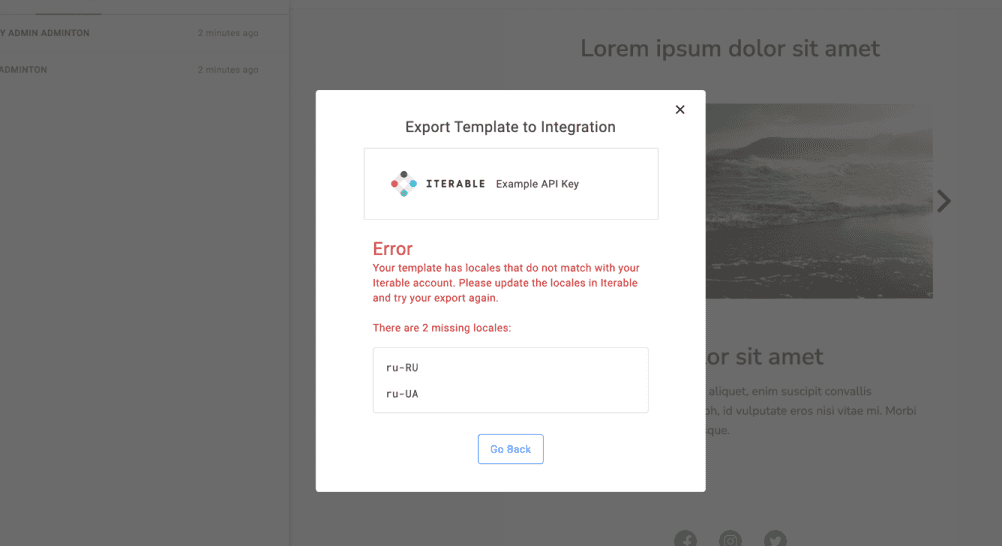
For the integration to work successfully, you’ll have to add Locales to your Iterable project. As long as the Locale exists in Iterable, our integration will be able to map the translations together. For example, creating an fr-CA locale in Iterable will allow you to map the French - Canada locale from Dyspatch. If the locale does not exist in Iterable, you’ll see the following error:
Learn More
With your new integration set up, read how to export your Dyspatch emails to Iterable.