Connect your Klaviyo account to Dyspatch and export emails to your Klaviyo account in a couple of clicks.
Connect your Klaviyo Account
Create a Klaviyo API Key
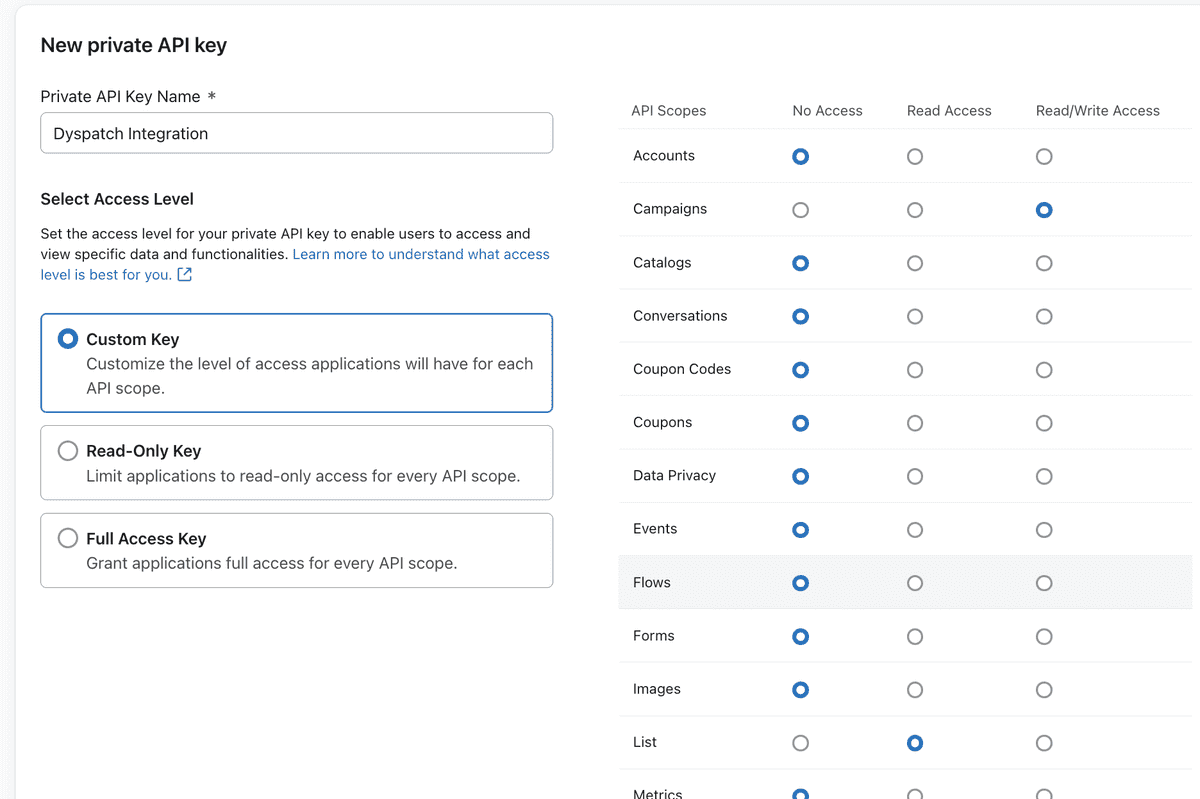
To set up your new integration, you will need an API key from your Klaviyo account. You can generate a new API key by clicking on your name, then going to Account & Billing > Account > API Keys.

Ensure your key is either a Full Access Key, or a Custom Key with:
- Campaigns: Read/Write Access
- List: Read Access
- Templates: Read/Write Access

Click Create to be shown your new API key. Save your API Key value somewhere secure, as it will only be shown to you this once.
Configure Klaviyo Integration in Dyspatch
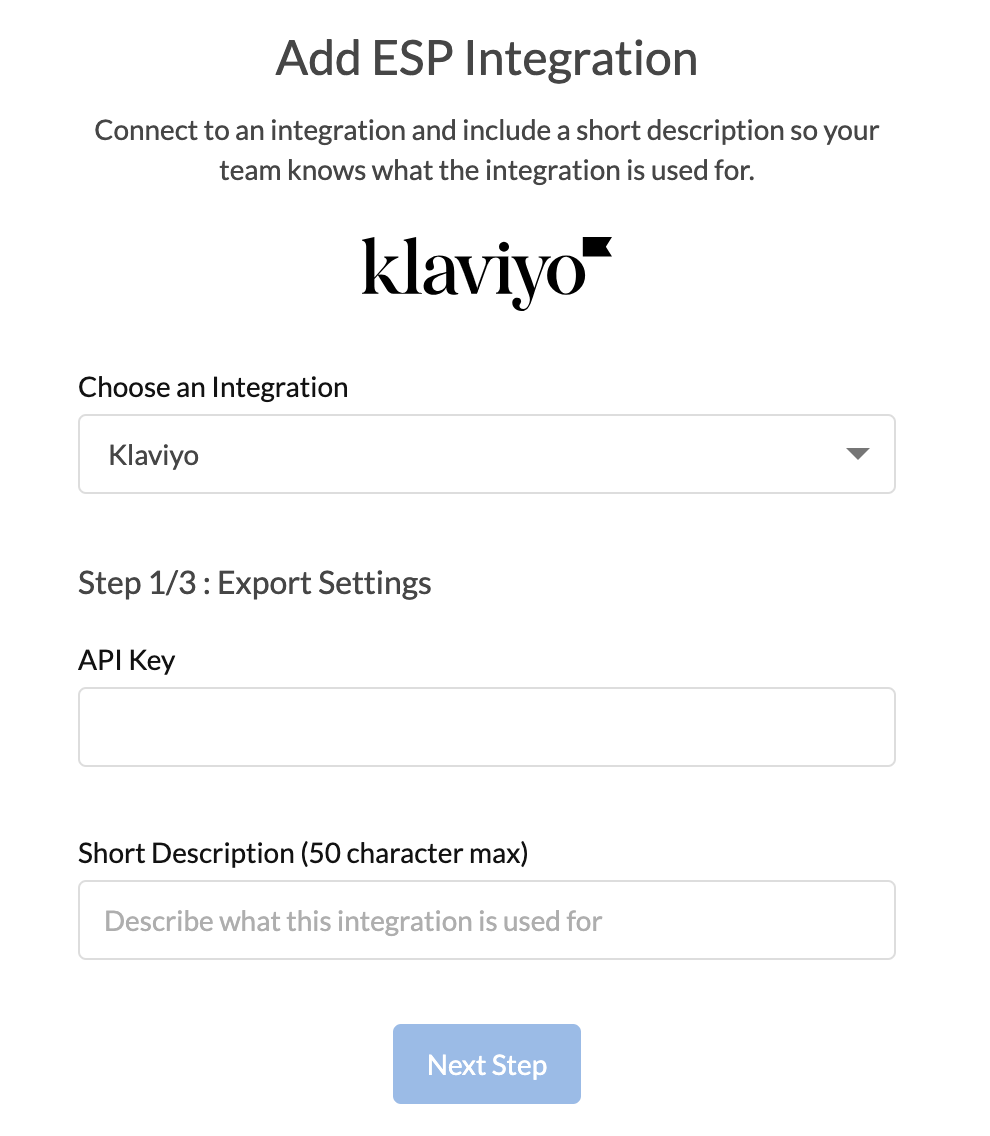
Once you have your key, select Add Integration on the Admin > Integrations page in Dyspatch.

Select Klaviyo from the Choose an Integration dropdown menu. Add your API key and a description for your team.

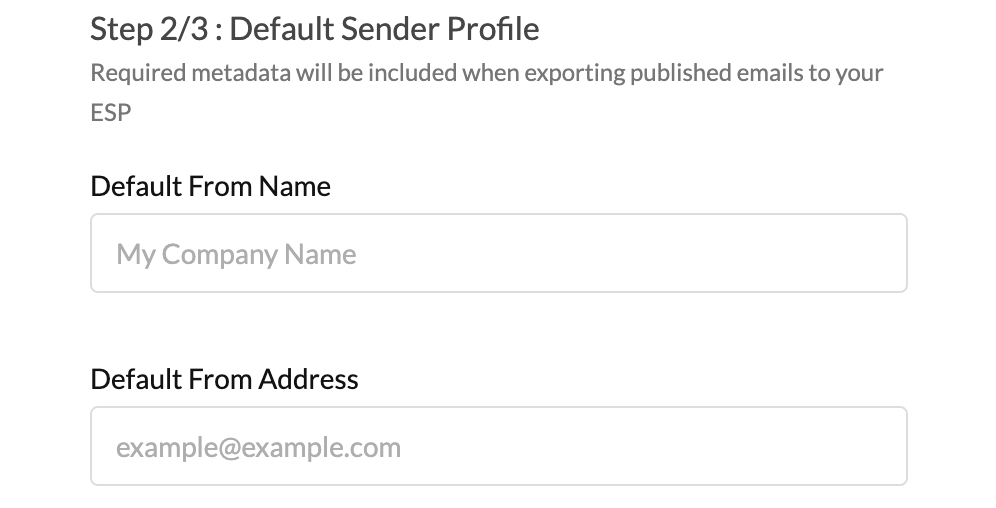
Next, add a default From Name and Address. This can be overridden for individual emails on the metadata tab in the email builder.

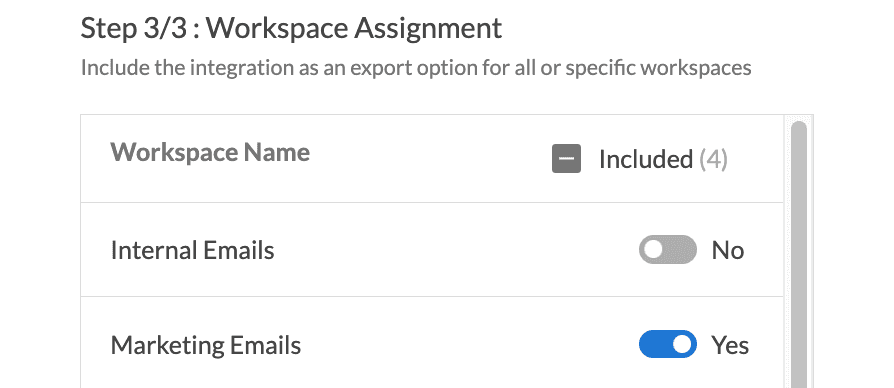
Lastly, toggle on the workspaces you want to enable for exporting using this integration, and click Add Integration.

That's it! Exporting your published emails directly to Klaviyo from the email builder is all set.
Learn More
See details on how to export your emails to Klaviyo directly from Dyspatch.