Quickly send your team's Dyspatch emails using Marketo's email marketing and sending services. This guide will outline the steps needed to integrate your Adobe Marketo account to Dyspatch.
Get Marketo Account Assets for Integration
To enable the Dyspatch integration with Marketo, you will need your Client ID, Client Secret, and Base URL from your Marketo account.
Retrieve Marketo Client ID and Client Secret
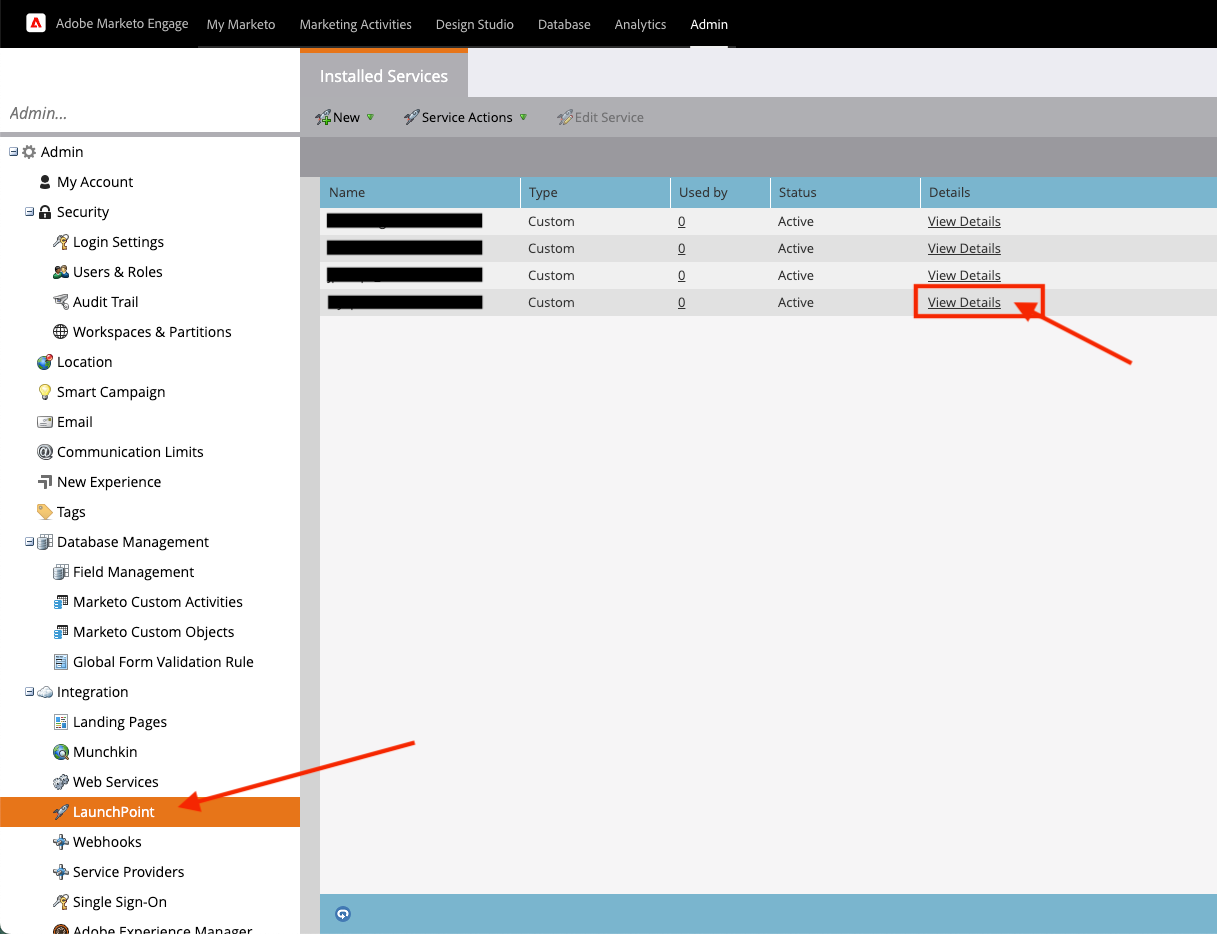
In the Admin Panel on the left side of your Marketo account page, select Admin > Integration > LaunchPoint.
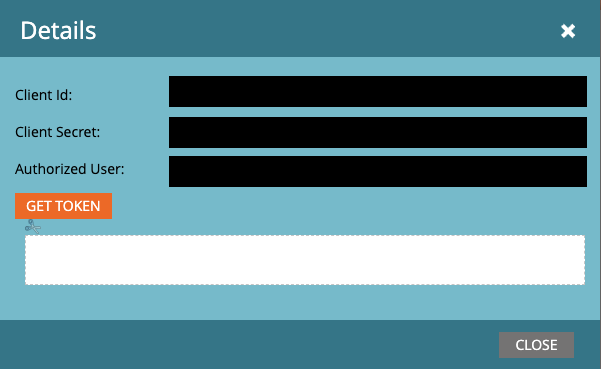
Select "View Details" for the custom Marketo service you want to integrate. This will display a box with your Client ID and Client Secret.
View the Authentication Marketo doc for more information.
Retrieve Marketo Account Base URL
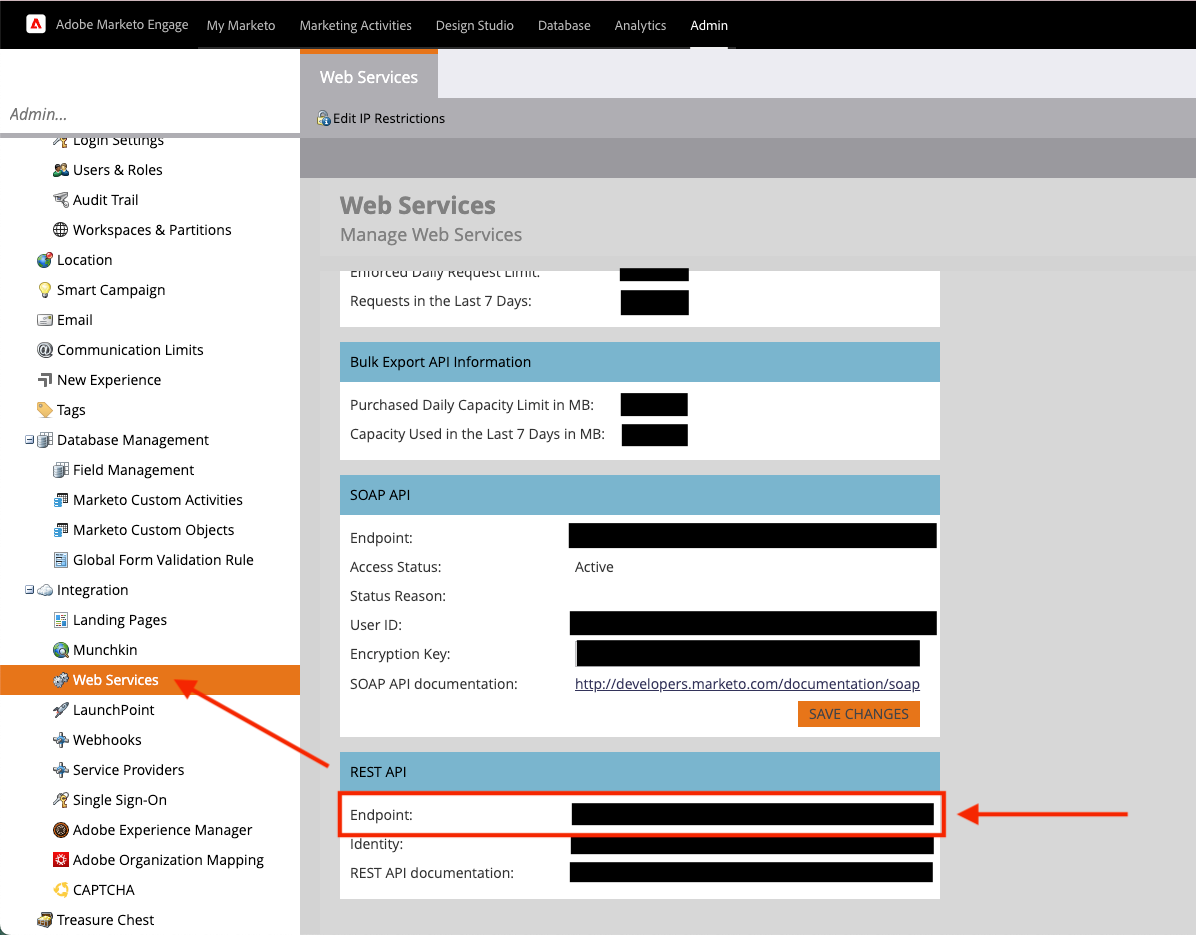
In the Admin Panel on the left side of your Marketo account page, select Admin > Integration > Web Services.
In the "Rest Api" table will be the "Endpoint" URL, that is your Base URL.
View the Base URL Marketo Doc for more information.
Connect your Marketo Account to Dyspatch
Now that you have the values needed from Marketo, you can add the integration in Dyspatch.
Select Add Integration on the Admin > Integrations page in Dyspatch.

Fill in the fields with the values you collected earlier.
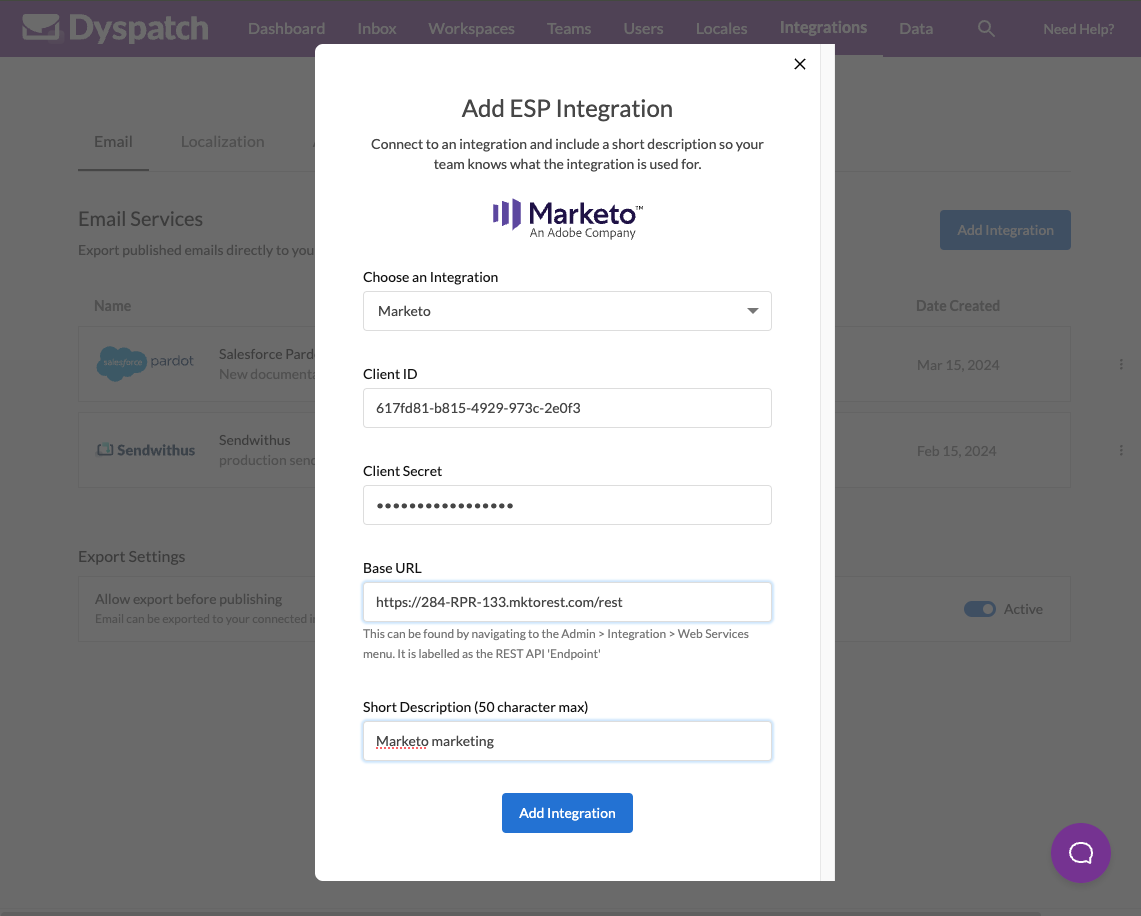
Find your Marketo Client ID, Client Secret, and Base URL.
Export to Marketo Integration
That's it! You can now export your emails directly to Marketo. Click Export from a published email, select the Export to Integration tab on the left side of the export modal and select Marketo.
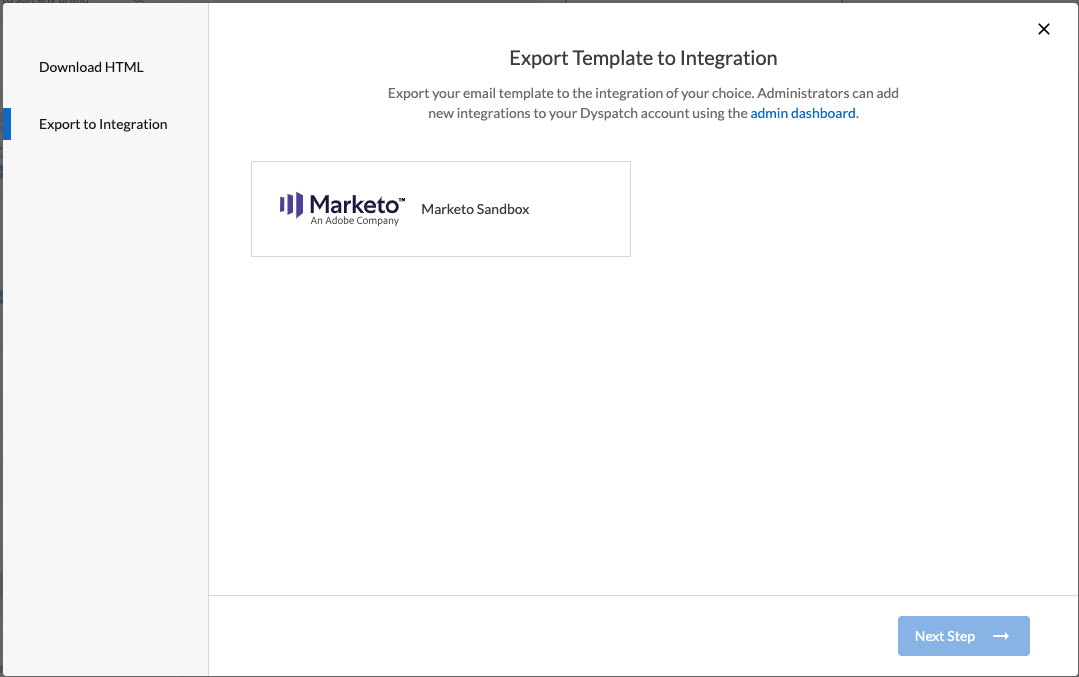
Dyspatch will automatically create an import folder labeled "Dyspatch Imports" in Marketo which will house your Dyspatch emails. You can find that under the "Marketo Design Studio" tab in your Marketo dashboard.