Use our integration with Salesforce Marketing Cloud (SFMC) to deliver engaging email experiences to your customers. This guide will outline the steps to find all the information needed to integrate your Salesforce Marketing Cloud account to Dyspatch.
Finding your Account MID
The following section will outline where to find your Marketing Cloud Identification (MID) number. Each Marketing Cloud business unit will have its own associated MID. If your team has multiple business units across your SFMC account, you will need to integrate each unit into Dyspatch.
Upon logging into your SFMC account, hover over the account name at the top right hand corner beside your user login. This will display your MID.

Finding your Client ID, Client Secret, and Authentication Base URI
Hover over your email address and select Setup.
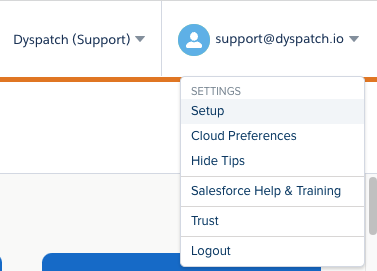
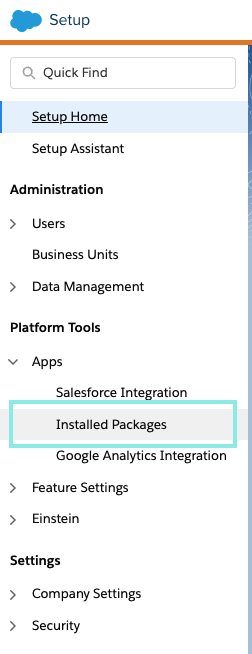
On the setup page, expand the Apps option and select Installed Packages.
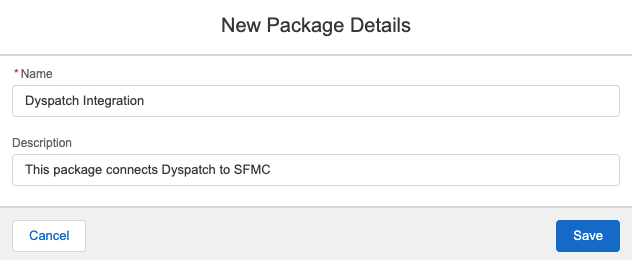
Click New, and add a Name and Description to set up a new package.
Once your package has been created, we can now add components to this package. Click Add Component.
For the component type, we will want to select the API Integration option, and the integration type will be Server-to-Server.
Lastly, for the component, we will want to configure the properties which will allow Dyspatch to connect to SFMC.
The minimum required properties to allow Dyspatch to export emails:
Channels:
- Email
- Read, Write
Assets:
-
Documents and Images
- Read, Write
-
Saved Content
- Read, Write
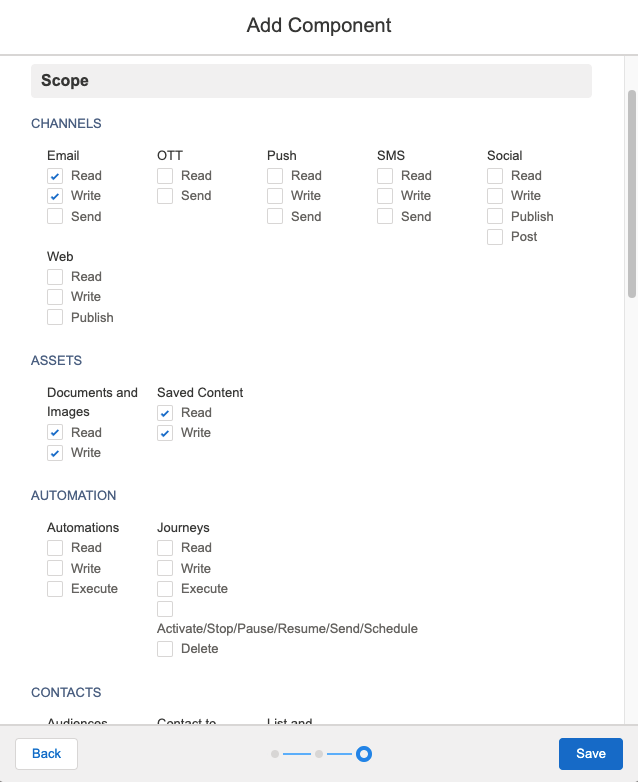
Once these have been configured, click Save.
After creating your component, you will now be presented with the Client ID, Client Secret, Authentication Base URI, which you can use to integrate the two accounts together.

Authentication Base URI
Dyspatch only requires the subdomain to be added in the Authentication Base URI field. Using this example: https://abcd89fefg12f1mj4356-a78d9e.auth.marketingcloudapis.com/, the subdomain value would be abcd89fefg12f1mj4356-a78d9e.

Connecting your SFMC to Dyspatch
Now that you have the values we need from SFMC, we can add the integration in Dyspatch.
Select Add Integration on the Admin > Integrations page in Dyspatch.

- Choose an Integration: Salesforce Marketing Cloud
- Account MID: 123456789 (Locate your MID)
- Localize Exports by: Language Only (en) OR Locale + Language (en-US)
- SFMC Attribute Name (Optional): Name of column that holds the preferred subscriber locale
- Short Description: Descriptive name to let other team members know what SFMC account this is
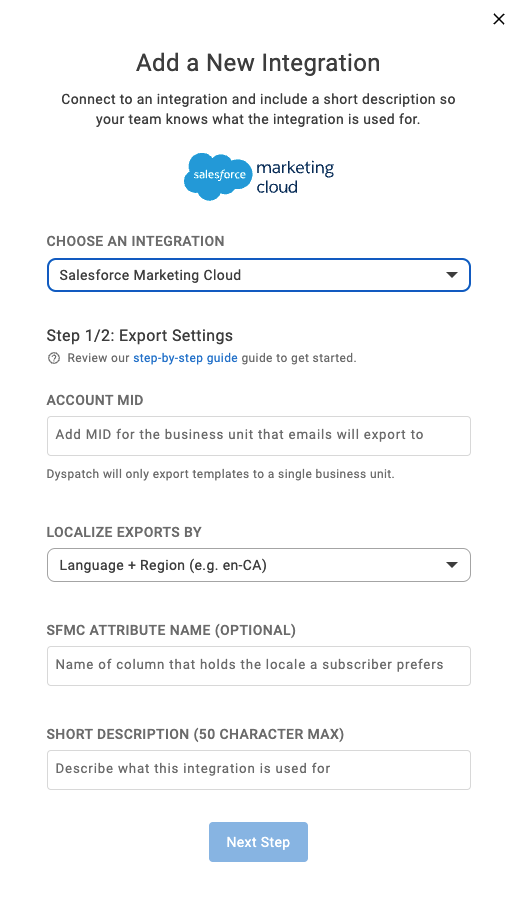
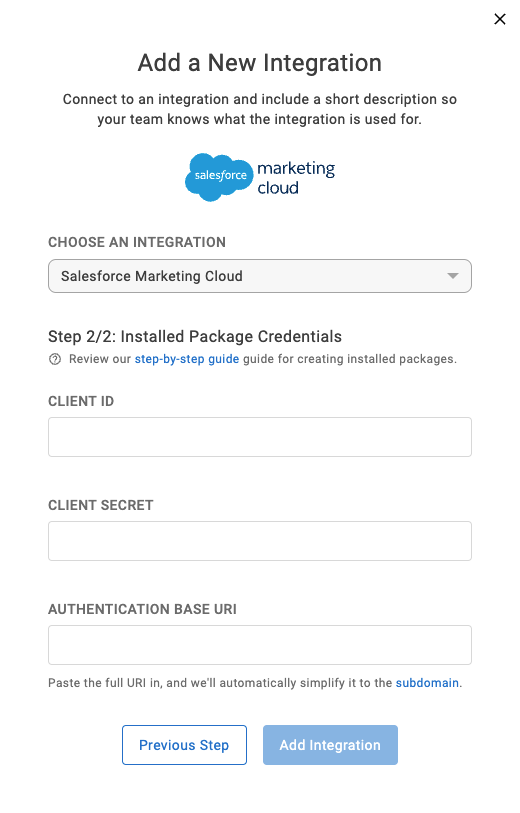
Add your Client ID, Secret, and Authenticatino Base URI on the next modal.
From our example, the values we would need are:
- Client ID:
abcde12345fghij67890klmno - Client Secret:
12345abcde67890fghij1234 - Authentication Base URI:
abcd89fefg12f1mj4356-a78d9e
Click here for steps on how to locate your team's Client ID, Client Secret, and Authentication Base URI.
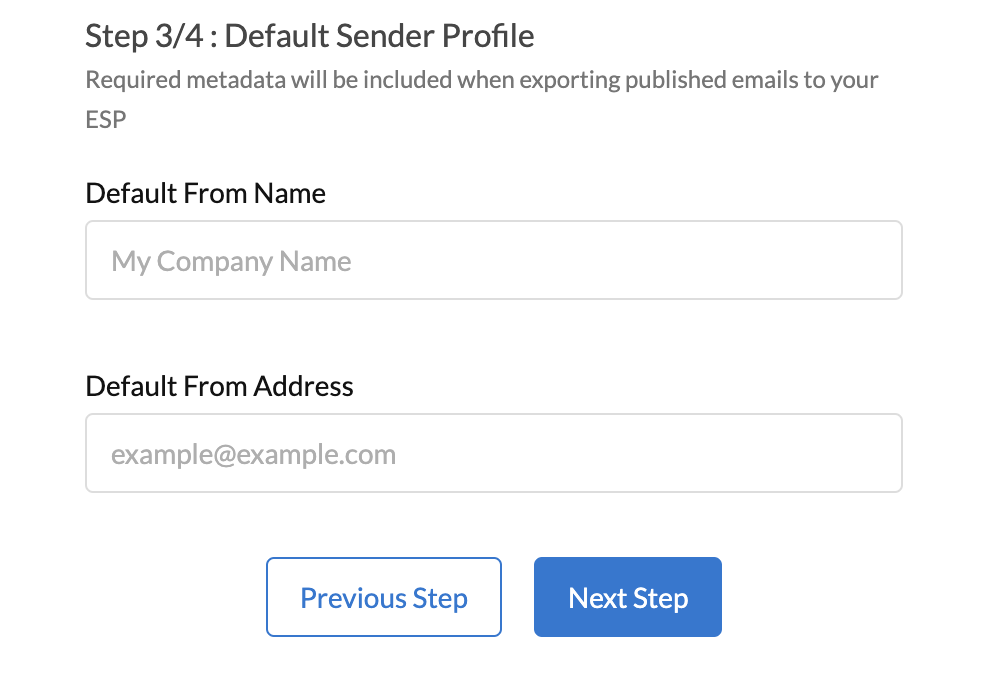
Next, include an optional default From Name and Address for the integration.
This can be overridden in individual emails on the email builder metadata tab.
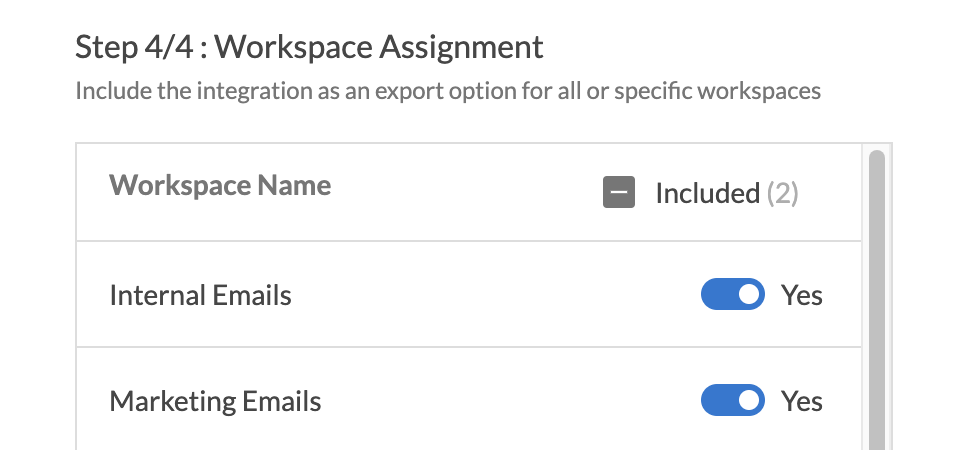
Lastly, toggle on or off each workspace you'd like this integration to be available in.
Once you have completed the fields, select Add Integration.
That’s it! You can now create a new email in Dyspatch and export your email to Salesforce Marketing Cloud directly from Dyspatch.
Your exported emails will appear in your SFMC Email Studio.