Connect your XTM account to Dyspatch to sync your localization workflow.
Get XTM Account Details
To integrate your XTM account with Dyspatch, you will need your XTM Server URL, XTM Client Name, XTM User ID, and associated password for that User ID.
Get XTM Client Name
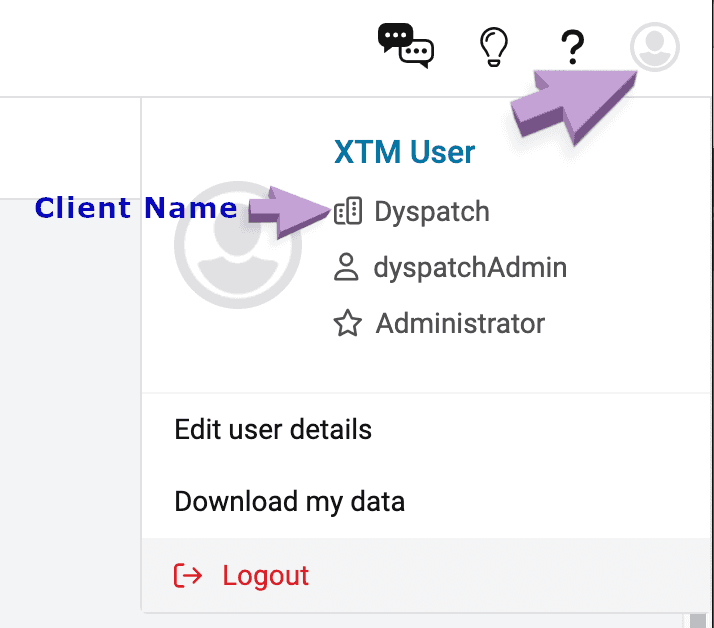
The XTM Client Name is also called the Company Name and can be seen by selecting your user icon in the top right of the XTM app.

Get XTM User ID
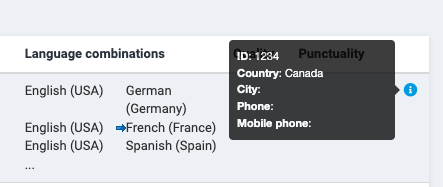
Navigate to your XTM user list by clicking on the "Users" tab at the top of the page, then hover over the i icon to get the User ID.


Connect your XTM Account to Dyspatch
In your Dyspatch account, navigate to the Integrations > Localization page and click the Add Integration button.

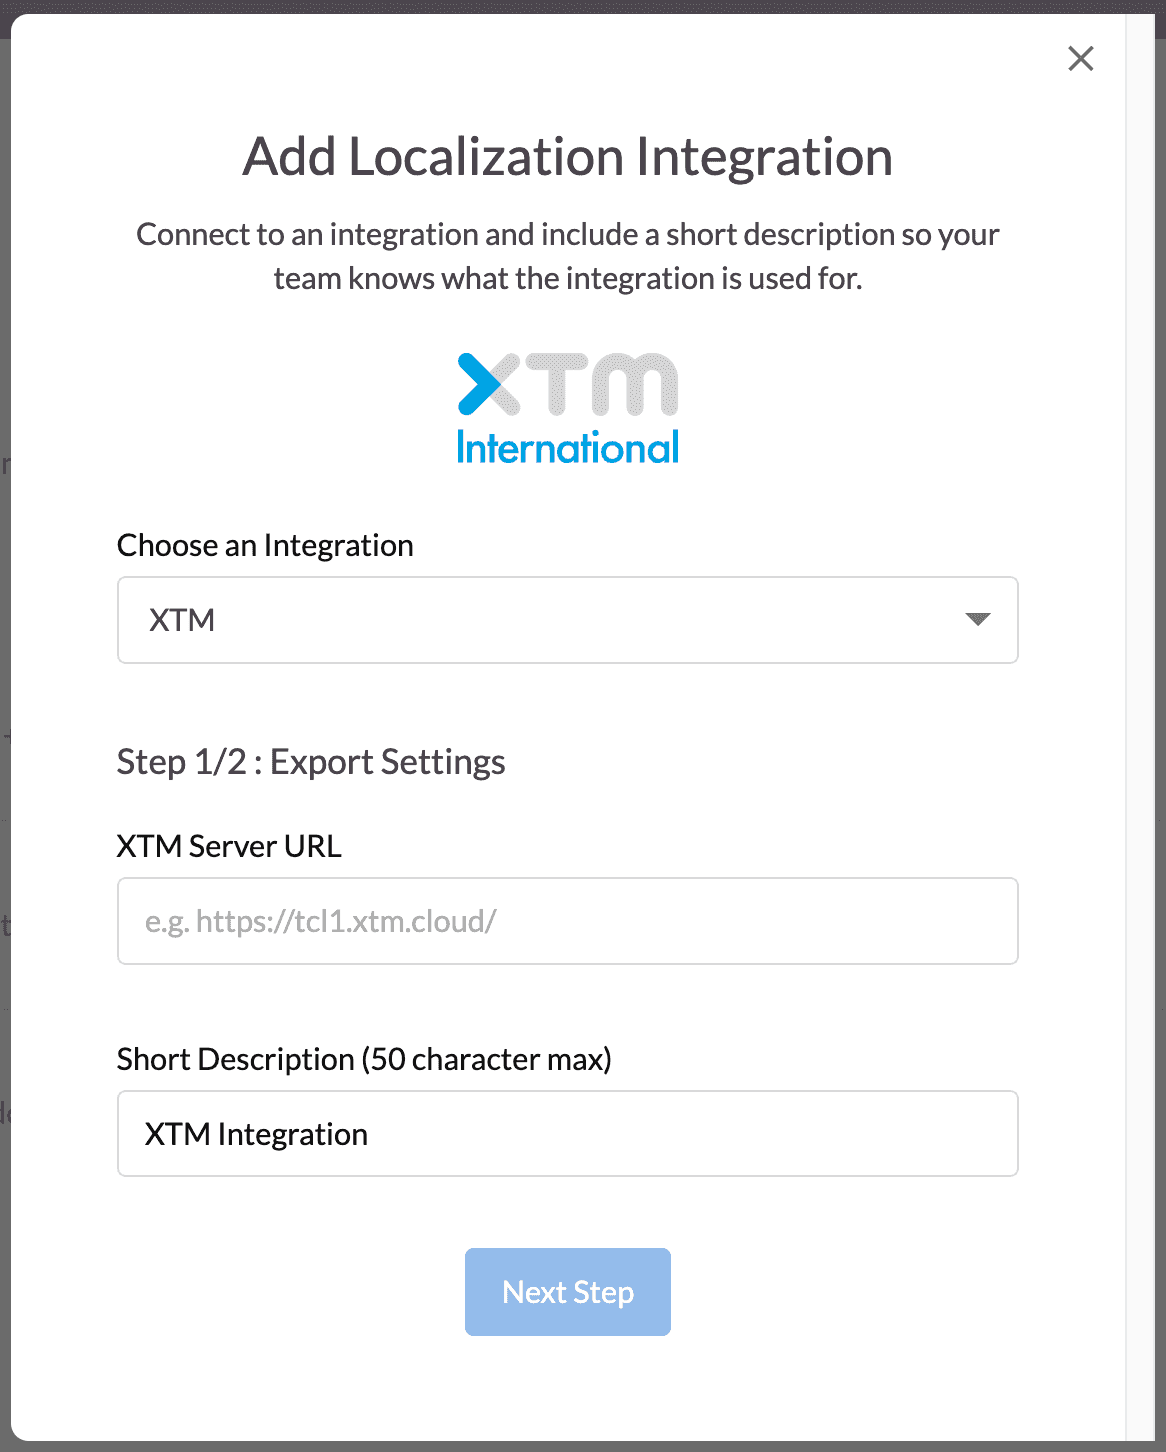
Choose XTM from the Integration dropdown window and add in your XTM Server URL. Add a short description for your team to recognize the integration, and click Next Step.

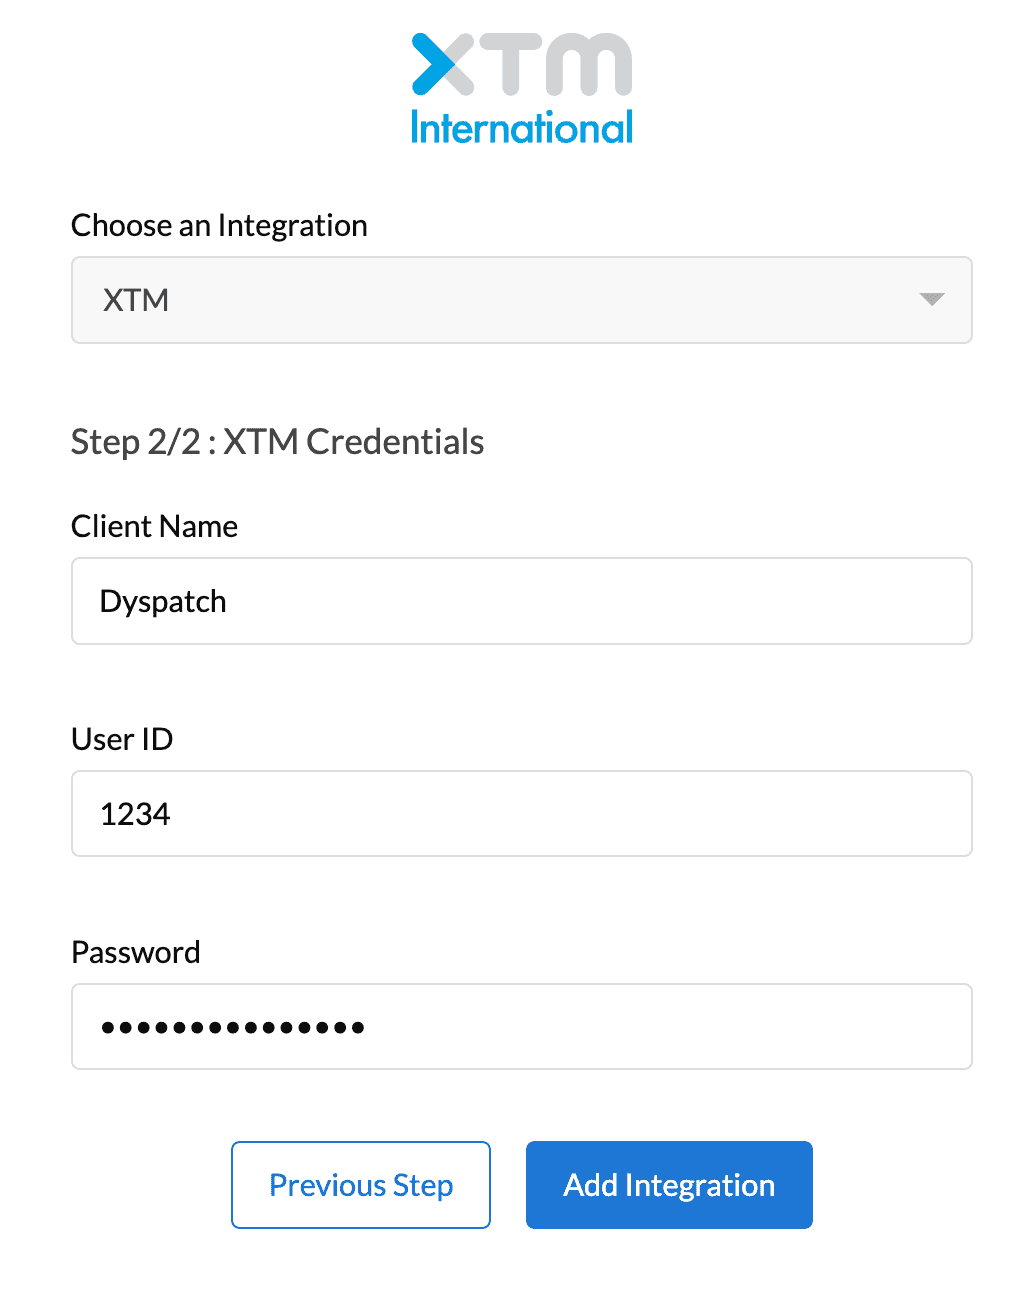
Add in your XTM Client Name, XTM User ID, and the associated password for that User ID. Click Add Integration to complete the process.

Once your new integration has been set up, you will be able to connect to your XTM workflow directly from Dyspatch.