Manage template localization outside of Dyspatch with POT(Portable Object Template) and PO(Portable Object) files.
What are POT/PO files?
POT (portable object template) and PO (portable object) files make up a text-based file system that is commonly used for localization and is accepted by many translation service providers. Each file will contain a message ID (msgid) and message 'string' (msgstr). A POT file will only contain the untranslated text strings and acts as a template for creating PO files which will contain both the untranslated text strings and the translations.
Example POT Content:
msgid "Hello"
 msgstr ""
Example PO Content:
msgid "Hello"
 msgstr "Bonjour"
Download the Localization Template POT file
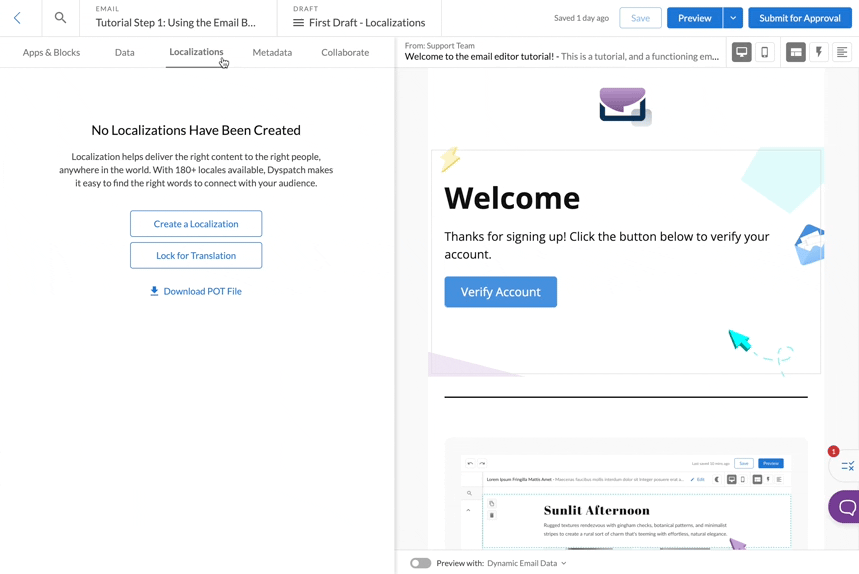
On the Localizations tab, select Download POT File. This will download a POT file containing all the content in the email that has the editable attribute.

Send the POT file to your localization provider
If your team uses a translation service the POT file can be sent to them for localization. Your translation service will use the POT file to create PO files that you can upload to Dyspatch in order to create your email's localizations. Skip to Uploading PO files to find out more about uploading PO files from a translation service.
Creating PO Files and adding Translations
For each locale you or your translation service wants to create, a copy of the POT file with the file extension .po will have to be created. We recommend the PO file is named something you will recognize while uploading it to the email builder. For example: de-DE.po.
In the PO file translations will be added below the msgid on the line with msgstr.
msgid "Hello"
 msgstr "Bonjour"
If any of your msgid’s contain variables, make sure the translated msgstr also includes the exact same variable name. Don’t forget the % at the beginning of the variable and the s at the end.
msgid "Hello %(FirstName)s."
 msgstr "Bonjour %(FirstName)s."
Uploading PO files
On the Localization tab, click Create a Localization and select Upload multiple localizations.
Select the PO files you've created to upload them all at once.
If the locale language code is in the file name, the localization will assign that locale for the translation. If needed, rename the localization and click Apply All to finish creating your new localizations.

You should now have all the localizations you've created available in the email builder. Preview the localizations using device previewsDevice PreviewsView how your email looks when opened in different devices and email clients. and publish the email to make the localizations available via the APIApiDyspatch’s ‘Application Programming Interface’ allows developers to programmatically access their organization’s emails and SMS messages from Dyspatch..